Using ClassiPress 4.x you can create custom fields and then apply these to a form. This allows you to gather specific ad information that relates directly to the site you have created. This is very useful if you want to collect different information on a category-by-category level. For example, if the majority of ads posted on your site will be about cars for sale, you may wish to create a specific form that asks for the make and year of the car.
Note:
If you do not wish to use this feature there is nothing you need to do. The default form will be used instead. If you wish to change the default form then you will need to create a new form and apply all categories to it. Any category without a form will always fall back to using the default form.
Locating the Custom Fields and Form Menus
- Click on the Ads menu.
- Once in Ads, you will see a number of different menus. The two menus we will focus on in this documentation is the Forms menu and the Custom Fields menu.
Creating Custom Fields (Step 1)
You will first need to create the custom fields that you will add to your form.
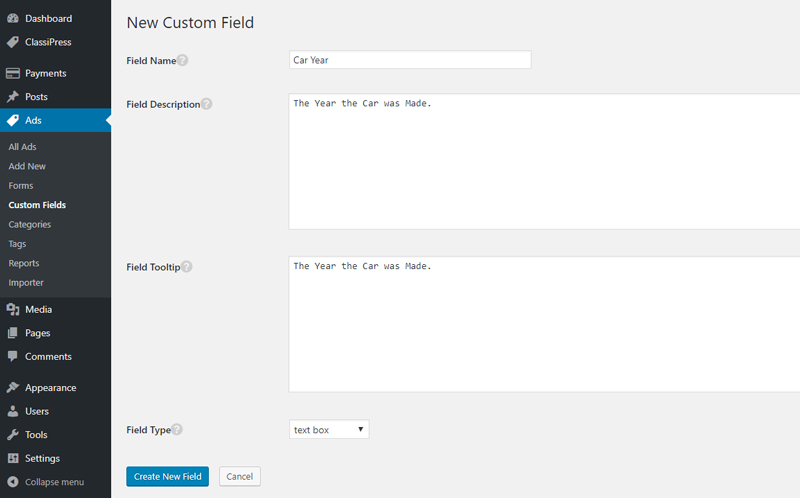
- Once you are in the Custom Fields menu, click the Add New button.
- You will need to give your field a Name and a Description. For example, the name could be ‘Car Year‘ and the description could read ‘The Year the Car was Made‘.
- Add a Field Tooltip if needed. The Tool Tip field allows you to put a message next to the field so users can get more information about what is required.
- Choose the Field Type. This is what you expect for a response. For example, if you want a text answer choose Text.
- Once you are complete click the Create New Field button. Any field you create can be used for multiple forms.
- Create any additional custom fields that you will use in your form.
Creating a Form (Step 2)
Think of a Form Layout as a container for fields. Fields alone do nothing. Once your fields are complete you can add them to a form.
Creating the Form
- Once you are in the Forms menu click on the Add New button.
- Give your form a Name. The name should best describe what category this form applies to.
- Enter a Description for the form. This will not be visible to your users.
- Check each Category that this form will apply to. Each form can be applied to multiple categories although each category can only have one form. Any category that does not have a custom form will use the default form.
- Once you have completed the form click the Create New Form button.
- You have now created a form. The next step is to add the custom fields to the form.
Adding Custom Fields to the Form

- From the Form Layouts page click on the Edit Form Layout button for the form you wish to add Custom Fields to.
- On this page you will see two columns. The left side is what your form will look like. The right side contains the available fields you can add to your form. Go ahead and check the three fields we just created and click Add Fields to Form Layout. The page will reload and you will see that they moved to the left side.
- You can reorder, remove, and make certain fields mandatory. To reorder your fields, just drag and drop them. To make them mandatory check the box under the required column. Lastly you can choose which fields use advanced search.
- Once you are all done make sure to click the Save Changes button.
- This form will now appear when someone clicks on the category that you specified. In the image above, that form will appear only for the Cars category.
What will my Form Look Like?
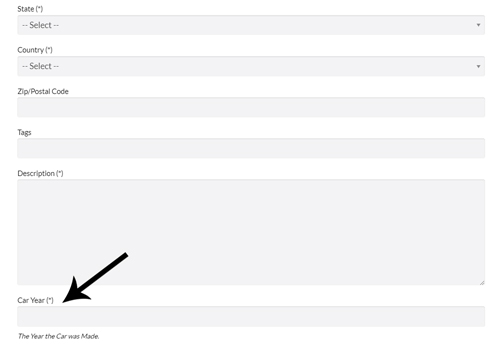
When a user selects an ad category that has a custom form applied to it, they will need to fill out that form opposed to the default form. In the example below, the user has selected the Cars category. This has a custom form attached. As you can see there is an extra custom field within this form.