Enable Events
This tutorial is for Vantage (our WordPress directory theme). There are just a few things you will want to do to get Events going. We will walk you through the process here.
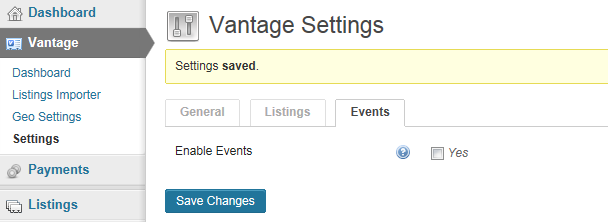
By default, events in vantage is disabled. To enable events in the administration panel, go to “Vantage > Settings > Events”. Here you can see an option “Enable Events”, checking this option and saving changes will enable events in Vantage.
Configuring Events
After you have enabled events you will be able to see the remaining configuration setting options.
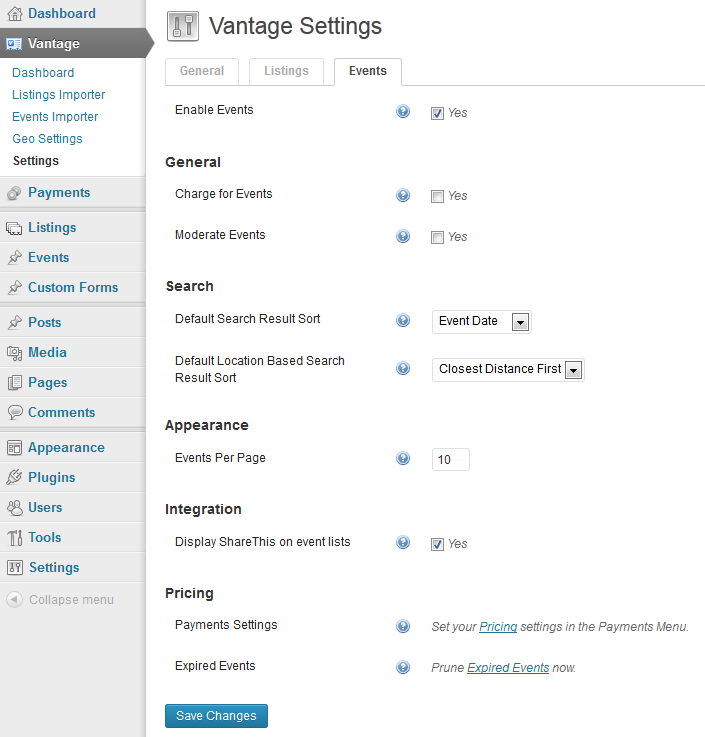
General Settings
- Charge for Events – Allows you to charge users for posting an event to your site. Default value is unchecked. Check “Yes” to enable.
- Moderate Event – Checking “Yes” means that newly posted events will be held in moderation. The event will not be published until you approve it (see more info on approving events at the bottom of this tutorial).
Search Settings
- Default Search Result Sort – Applies default sorting order for events search results – only when search by location is not involved. The options for these settings are:
- Event Date – Events are sorted event date.
- Newest First – Listings are sorted by the time the event was created. The most recently created listings will appear at the top.
- Alphabetical – Events are sorted alphabetically by event name.
- Popular – Events are sorted by number of event comments and number of attending (see tutorial on attending widget).
- Default location based Search Result Sort – Applies default sorting order for events search results when searching by location. The options for these settings are:
- Closest Distance First – Events are sorted by distance from the location searched.
- Event Date – Events are sorted event date.
- Newest First – Listings are sorted by the time the event was created. The most recently created listings will appear at the top.
- Alphabetical – Events are sorted alphabetically by event name.
- Popular – Events are sorted by number of event comments and number of attending (see tutorial on attending widget).
Appearance Settings
- Events Per page – Determines the number of events displayed on each list page. For example if you enter “5”, five events will be shown on home page or any page where events are listed.
Integration Settings
- Display ShareThis on Event Listing – This option is used to display social media sharing options provided by the ShareThis plugin. By default this option is disabled. To enable this option, you will need to install the ShareThis plugin.
Setting up Payments for Events
Now that we have configured all the general settings events, let’s go ahead and setup payment settings for events.
Vantage allows you to charge for users to post events to your site. Events are offered with a simpler pricing structure than listings but you still get plenty of listing options.
Enable Payments for Events
If you are going to charge for events, you want to enable this in Vantage. The default setting for this is “Off”. To enable it, go to Admin > Vantage > Settings >Events. You should see the admin panel pictured below.
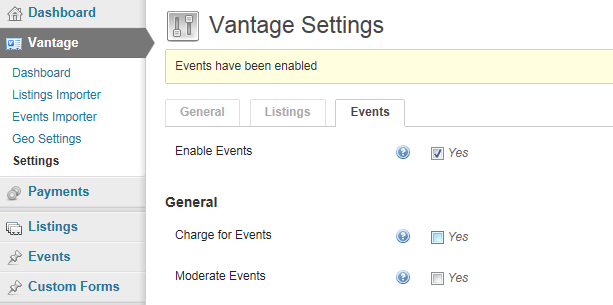
Make sure “Charge for Events” is checked and click the “Save Changes” button. Vantage will now charge for Events.
Pricing Settings
Now that we have enabled charging for events, let’s see how to set up pricing for events in Vantage. Go to Admin > Payment > Settings > Events tab to access payments settings for events. Payments settings for events will not be accessible if charging for events is not enabled.
Settings for pricing are explained below.

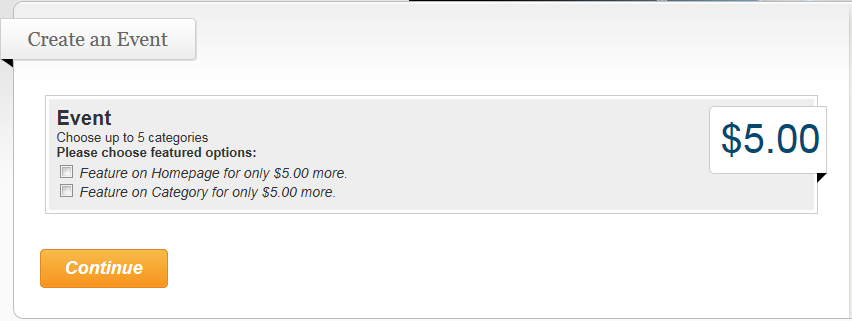
- Price: Sets the price for adding a single event.
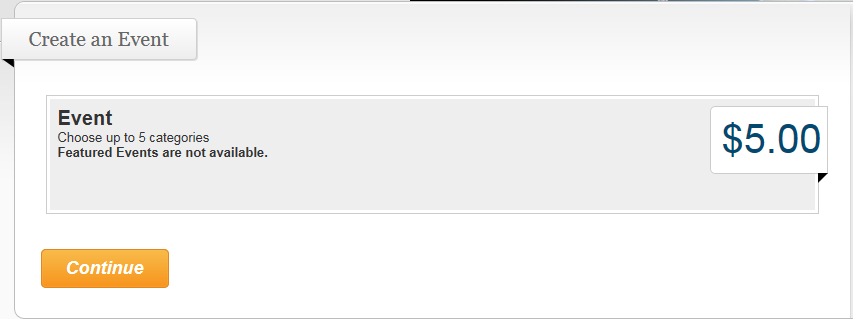
- Enable Featured on Home: Allows users to post events which will appear on the home page and marked as featured.
- Featured on Home-Price: Sets the price for an event featured on the home page.
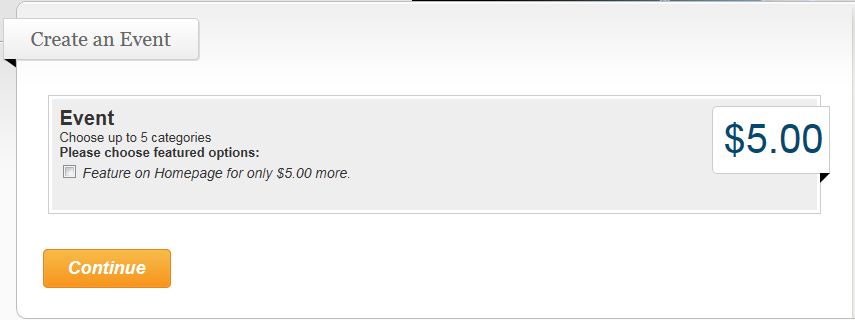
- Enable Featured on Category: Allows users to post events which will appear on a category page and marked as featured.
- Featured on Category-Price: Sets the price for an event featured in category.
- Surcharges for Event Categories

Surcharges allow you to charge a little more for posting events in specific categories. Surcharges are added to the regular price to post an event.For example, if an event is created in the “Automobile” category, the total cost of creating the event will be $30 ($5 for the listing price and $25 for the category surcharge).
To learn more about pricing and other pricing settings in Vantage, read our tutorial Setting Up Payments in Vantage.
Events are Now Ready to Go!
Once you have enabled events, saved events settings and set up event pricing, you’re ready to go. Your site’s visitors can now post events to your Vantage business directory website.
If you did not enable events moderation, all new events will be published to your site immediately. On the other hand, if you enabled events moderation, you will need to approve events before they are published. Let’s take a look at how that is done.
Moderating Events
Reviewing Events before they are posted is a good way to make sure that the content on your site is top-notch. See the instructions above to find out how to enable events moderation.
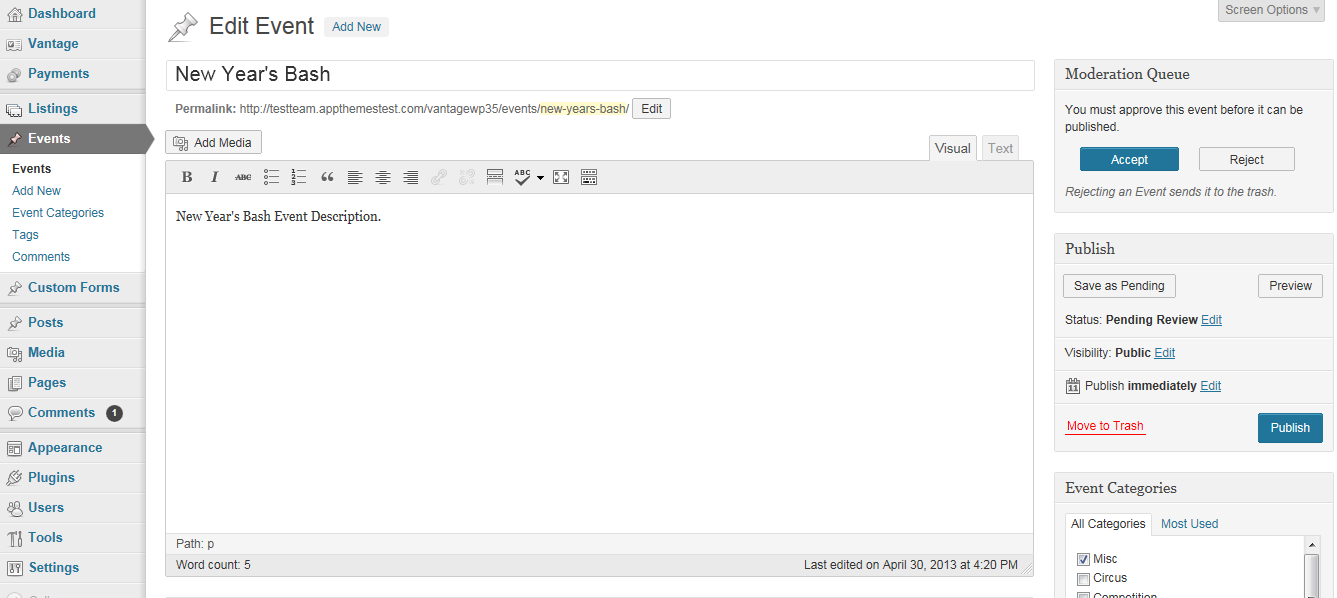
Approving an Event
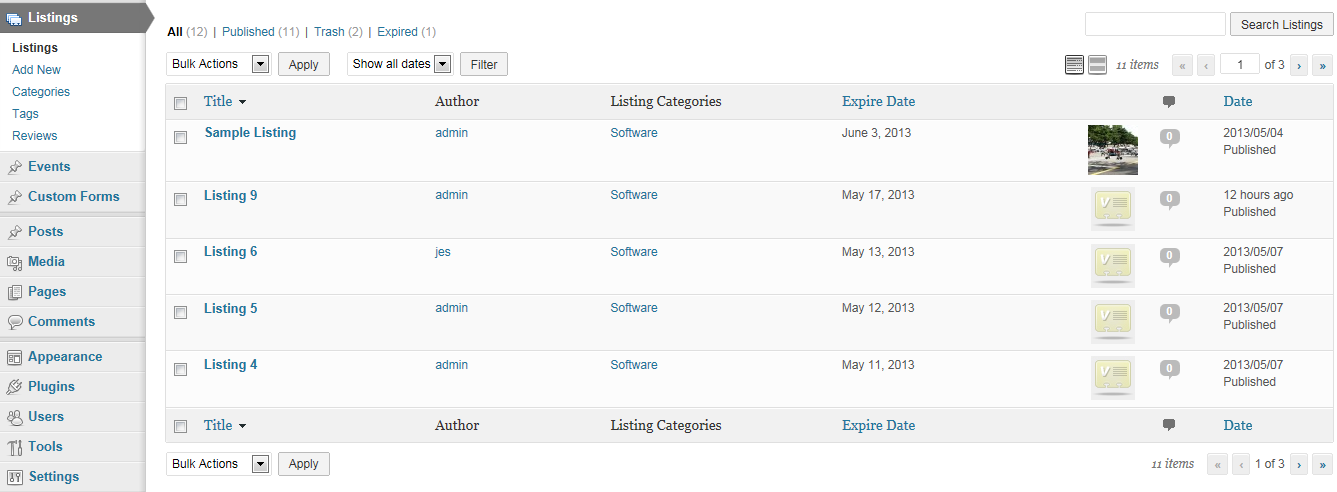
Let’s see how to approve an Event posted by a user. Start by going to Admin > Events and a list of all the Events posted will appear.
At this point, you have a couple of options on how you can approve an event.
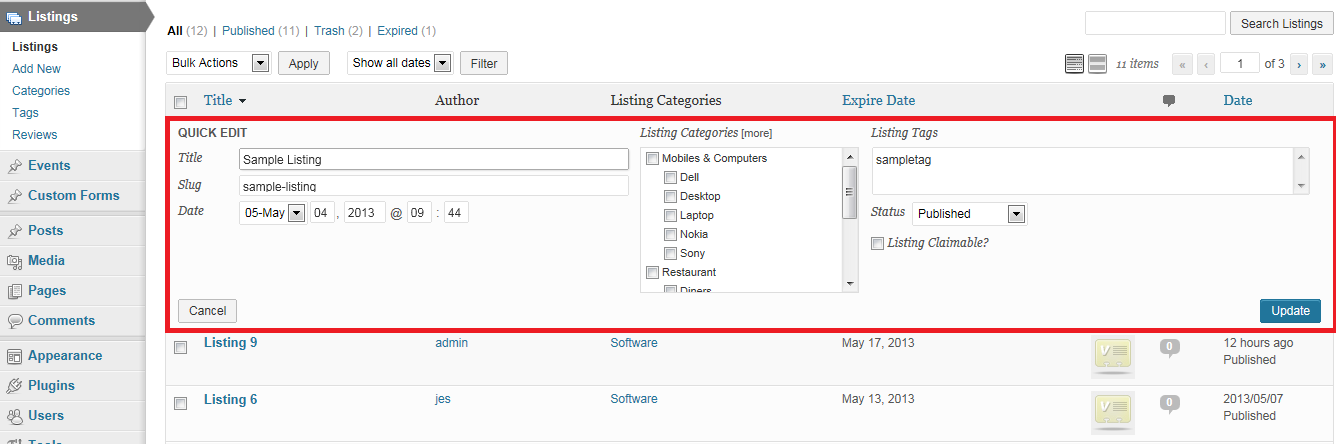
- Approve via Quick Edit – In the list of events, hover the mouse pointer over the title of the event you wish to approve. From the links that appear below the title, click the “Quick Edit” link. This will open editing options for that event. Change “Status” to “Published”, and click on the “Update” button. This will approve the Event and make it visible to everyone.
- Approve via Edit Page – In the list of events, click any event to edit it. On the Edit Event page, click the ‘Accept’ button in the moderation queue box to approve the event.
Like this tutorial? Subscribe and get the latest tutorials delivered straight to your inbox or feed reader.