
Before we will begin, I would like to clarify that creating grandchild themes is not supported in WordPress, and probably will never be. We’re not going to exactly describe how to make grandchild themes but the title feels appropriate for the process described below. Fear not, it’s 100% WordPress legit!
Why Grandchild Themes Might be Needed
We wrote several tutorials about creating Child themes which are the easiest way to style and change default functionality of our themes. But since we opened the Marketplace, AppThemes and collaborating developers have created many, ready to install child themes for our app themes.
Let’s say now, that you are using ClassiPress, but you don’t want your site to look like every other ClassiPress site out there. To get a fresh new look to your site, you’ve decided to purchase child theme (like Flannel, Eva or SuccessWeb) from our marketplace or elsewhere.
Then, after some period of happily using your child theme, you have decided to change the styling a little, add new javascript, or re-design one of the templates. How do you make modifications to the child theme without creating problems for yourself?
The first thing that may come to mid is to create a “Grandchild Theme” in the same way a child theme is created. unfortunately, WordPress does not support that (it would create “sick” hierarchy where the final result would have long tree of dependencies).
So what do we do now?! There is an alternative – create a “Grandchild theme as a plugin”!
Step 1 – Plugin base
- Create a new folder “
flannel-grandchild” in the “/wp-content/plugins/“. - Create a new empty file “
grandchild-functions.php” in previously created folder. - Add necessary plugin headers in newly created file, as shown below:
/*
Plugin Name: Flannel - Grandchild theme plugin
Description: Grandchild theme for Flannel build as a plugin.
Author: Your Name
Author URI: http://www.your-website.com
Version: 1.0
*/
We can visit now “WordPress->Plugins” page in the WordPress admin, and see our newly created plugin. It should look something like this.
Step 2 – CSS and Javascript files
- In plugin dir create an empty file “grandchild-styles.css”
- In plugin dir create an empty file “grandchild-scripts.js”
- In “grandchild-functions.php” add the code below to register and enqueue new files:
// Adds our new file with styles
function grandchild_add_styles() {
	wp_register_style( 'grandchild-style', plugins_url( 'grandchild-styles.css', __FILE__ ), array(), '1.0' );
	wp_enqueue_style( 'grandchild-style' );
}
add_action( 'wp_print_styles', 'grandchild_add_styles' );

// Adds our new file with scripts
function grandchild_add_scripts() {
	wp_register_script( 'grandchild-script', plugins_url( 'grandchild-scripts.js', __FILE__ ), array( 'jquery' ), '1.0' );
	wp_enqueue_script( 'grandchild-script' );
}
add_action( 'wp_print_scripts', 'grandchild_add_scripts' );
You can activate your new “Flannel – Grandchild” plugin, refresh the front page, and check view HTML source to ensure that the new files are there.
Step 3 – Styling
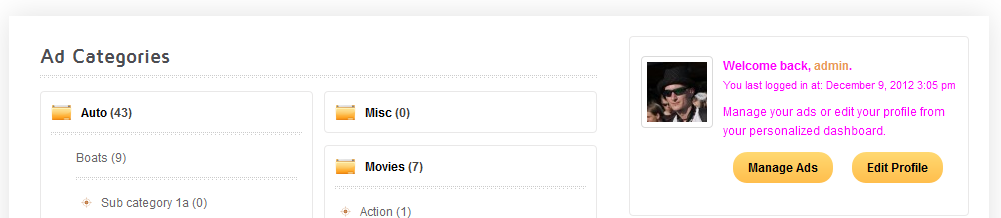
It’s as easy as creating styles any other place. For example, let’s change the text color in user welcome widget. Add the styles shown below to “grandchild-styles.css” file
.home .shadowblock .user p { color: #FF00FF; } |
You can see results here.
Step 4 – Scripting
Again, this is as easy as creating scripts in any other place. As an example, you can replace the footer ‘Powered by…’ note to ‘Changes made by…’ by adding the below scripts into “grandchild-scripts.js” file
jQuery(document).ready(function() { jQuery('div.right').html( "<p>Changes made by Your Name</p>" ); }); |
You should get something similar to what you see here.
Step 5 – Templates
To make replacing templates as easy as possible – in the same way it is done with child themes – we will use ‘template_include’ filter to check for templates in ‘templates’ folder in our plugin.
- Add below code into “grandchild-functions.php” file:
// Search for templates in plugin 'templates' dir, and load if exists
function grandchild_template_include( $template ) {

	if ( file_exists( untrailingslashit( plugin_dir_path( __FILE__ ) ) . '/templates/' . basename( $template ) ) )
		$template = untrailingslashit( plugin_dir_path( __FILE__ ) ) . '/templates/' . basename( $template );

	return $template;
}
add_filter( 'template_include', 'grandchild_template_include', 11 );
- In our plugin create a new folder called “templates”
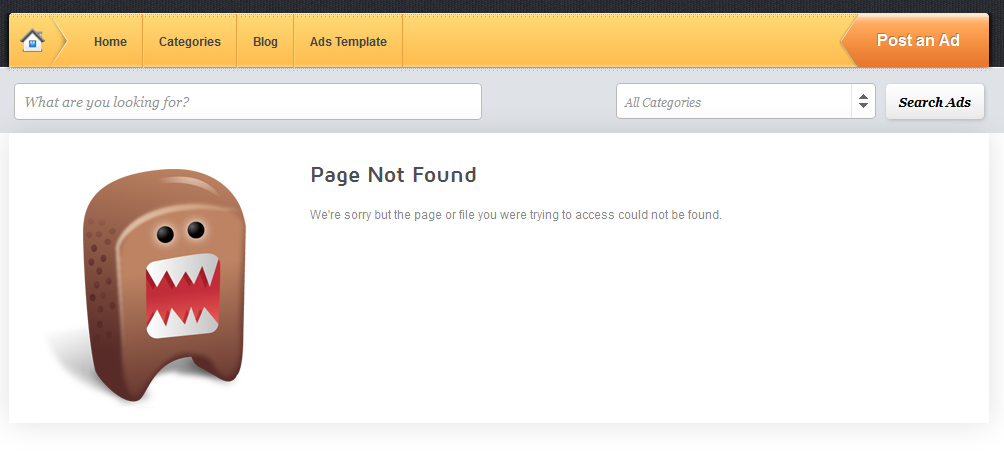
- Create a “404.php” file in newly created folder with content as below:
<div class="content">

	<div class="content_botbg">

		<div class="content_res">

			<div class="shadowblock_out">

				<div class="shadowblock">

					<div style="float:left;width:270px">

						<img src="//cdn.appthemes.com/wp-content/uploads/2011/07/domokun.png">

					</div>

					<h1 class="single dotted">Page Not Found</h1>

					<p>We're sorry but the page or file you were trying to access could not be found.</p>

					<div class="pad25"></div>

				</div><!-- /shadowblock -->

			</div><!-- /shadowblock_out -->

			<div class="clr"></div>

		</div><!-- /content_res -->

	</div><!-- /content_botbg -->

</div><!-- /content -->
You can see the end result here.
Download
To give you a head start, you can download the plugin created in this tutorial by clicking here.
Like this tutorial? Subscribe and get the latest tutorials delivered straight to your inbox or feed reader.


