Every coupon in Clipper should have a store associated with it. The store is the retailer or business where the coupon discount or deal can be redeemed.
It’s best to create lots of stores before launching your site so it’s easy for visitors to select which store their new coupon belongs to. Visitors also have the ability to create new stores if one is not listed when submitting a new coupon.

Setup Stores
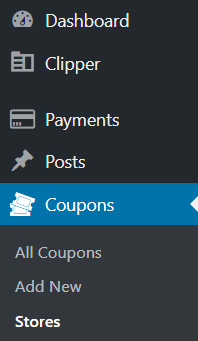
1. Under “Coupons” in the admin menu, click “Stores”.
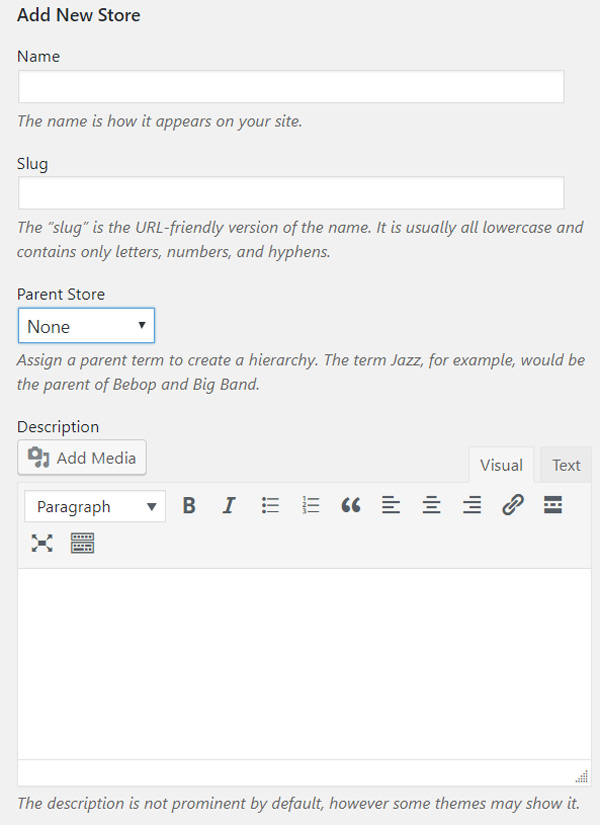
2. You can create a new store with the form on this page.
- “Name” is the name of the store
- “Slug” is a URL-friendly version of the store name. If you leave this field blank, Clipper will create a slug for you (leave blank is recommended).
- The “Parent” drop down menu will allow you to choose a parent store from a list of the stores you already have entered. Choosing a parent for the store you are entering causes the that store to be a child or sub-store to the parent store (not recommended).
- “Description” allows you to add general info about the store which is displayed on the store page so it’s important to write a few sentences describing the store.
- Entering the “Store URL” is important for a few reasons:
- It lets your users know the website where the coupon can be redeemed.
- It will be used to auto-create a screenshot of that store’s website.
- It creates a hyperlink from the coupon to the store
- You can select the checkbox towards the bottom that allows this store to be featured on the homepage of your website.
3. On the right side of the “Stores” page, there is a list of all the existing stores. Amazon.com is the default store that is installed with Clipper. Clicking any store in the list will allow you to edit that store.
4. As mentioned above, users will also have the opportunity to add stores through the “Share a Coupon” form. Any store added via this form will show up in the list of stores on the “Stores” page. After a user adds a store, you can add the description, edit or delete the store as needed.


