The Emails settings menu for ClassiPress 4.x consists of two different tabs. All email related settings for ClassiPress can be located in either one of these tabs.
Locating Email Settings for ClassiPress 4.x
The email settings can be found by:
- Click on the ClassiPress plugin menu.
- Now click on the Emails menu.
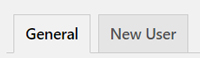
- You will see one tab titled General and another tab titled New User. Further configuration details for these two tabs can be found below.
General Email Tab Configuration
Within the General tab is where you can edit which emails are sent to the admin and to the user.
Ensure once you have configured the general email settings that you Save Changes.
Under the Admin section of this tab ensure:
- The recipient email is correct (this can be edited by clicking the change button)
- The checkbox is marked next to New Ad if you wish for admin to receive an email when a new ad is posted
- The checkbox is marked next to Pruned Ad if you wish for admin to receive an email each time the system prunes an ad
- The checkbox next to New User is marked if you wish for admin to receive an email each time a new user registers

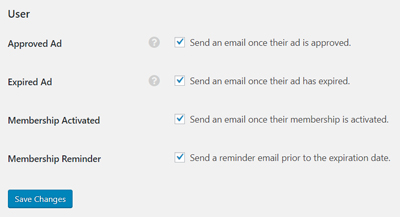
Under the User section of this tab ensure:
- The checkbox next to Approved Ad is marked if you wish to send an email to the user once their ad has been approved
- The checkbox next to Expired Ad is marked if you wish for your users to receive an email once their ad has expired
- Mark the checkbox next to Membership Activated if you wish to send an email to users once their membership is activated
- Mark the Membership Reminder checkbox if you wish for a reminder email to be sent to the user shortly before their ad expires
New User Email Tab Configuration
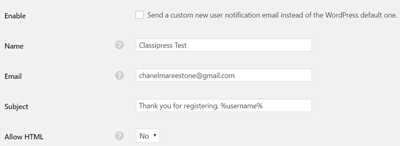
In the New User tab is where you can customize the email that your user will receive when they sign up to your ClassiPress site. Ensure you Save Changes once you have finished editing this tab.
- To send a custom new user notification email instead of the WordPress default one you will need to mark the Enable checkbox
- The Name field can be edit. This will be what your users see as the From Name
- The Email field should be your correct email that your users will see as the From Email Address
- The Subject field can be edit. The subject field is the first line of the email. By default it reads ‘Thank you for registering, %username%’.
- You can choose to Allow HTML by choosing Yes from the drop down. By default it is No.
- The Body field is where you can edit the body of the email sent to your users once they sign up to the site. For the majority of users this simple email can be left as is. Below the email Body field you can find email tags that can be used.