
Hey Clipper owners! So you want to keep your customers engaged with your site but you don’t want to spend hours making it happen? Not to worry, Clipper has a built in feature to that will keep your customer coming back again and again.
In this tutorial, we’re going to show you how to set up an automatic coupon newsletter using the “Coupons in Your Inbox” widget. After completing these tasks, visitors to your site will be able to add their email address then receive new coupon notifications via email.
Finding an Email Marketing Solution
In order to take advantage of this feature, you’re going to need to use an email marketing service that includes RSS-to-mail. There are several to choose from. We’ve created a email marketing solutions comparison chart for your convenience.
For this tutorial, we’re using MailChimp. We use MailChimp for our own email marketing and like the service. MailChimp offers ‘free plan’ that includes up to 2,000 subscribers and 12,000 email sends per month. This should be enough to start. If you need more, they offer also offer paid plans at reasonable prices.
If you’re using MailChimp, you need to create a free account. To do so, sign up at MailChimp and fill the registration form.
Create a Subscription list
To start, you need to create a mailing list. When people sign up on your Clipper site, their email address will be added to this mailing list.
You can create a list by logging into your MailChimp account, in the left sidebar click “Lists”. On the lists page, click the “Create List” button in the top right corner. You should now see a form, just like the one in the image below.
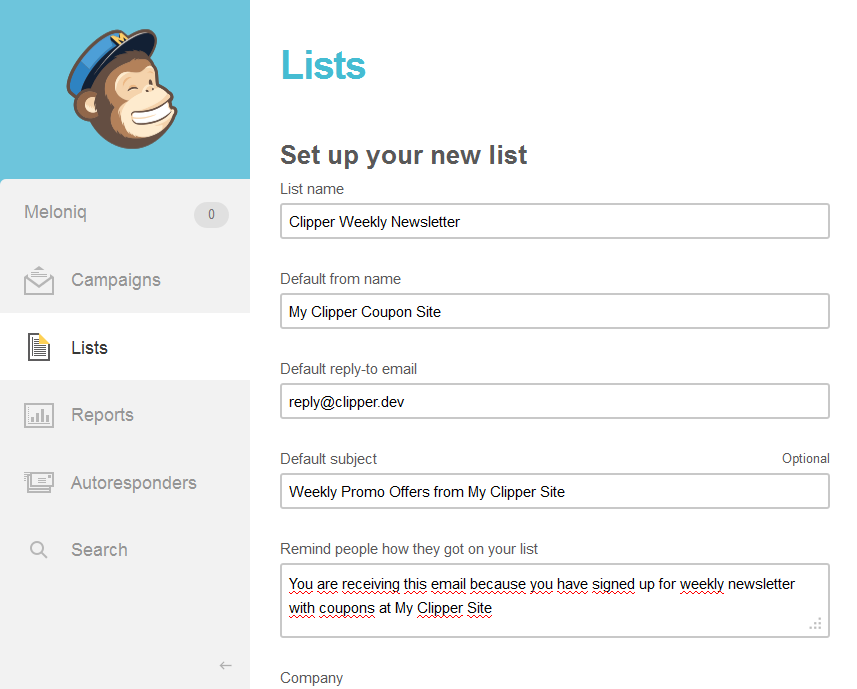
Each field is self-explanatory but if you need help, just click the text field and MailChimp provides a little help. Once you have completed all the fields, click the “Save” button to save your list.
Getting a forum URL
After saving your new subscription list, you need to get a form URL to enter into Clipper. Make sure you’re on the “Lists” page in MailChimp and go to the “Lists” menu. Expand the drop-down menu from your newly created list and choose “Signup forms”, as shown on the image below.

On the next screen you have three options “General forms”, “Embedded forms”, and “Form integrations”. Choose the “Embedded forms” option. It will take you to page where you can customize your subscription form but all we need from this page is the form URL which you find in “Copy/paste” section – see image below.
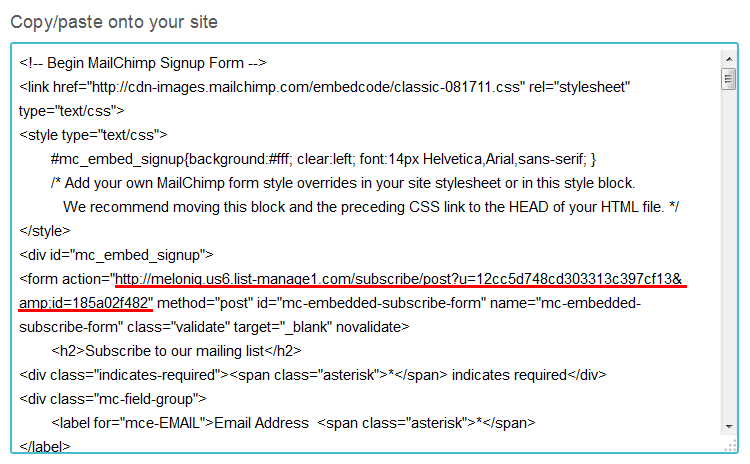
Copy URL highlighted on image above and save in safe place for later. Note: your code will look a little different from the image above. The important thing is to copy the the code after form action=. Do not include the quote marks.
Setting Up the Subscription Widget
Clipper comes with subscription widget called “Coupons in Your Inbox”. We will used this widget to connect with our MailChimp subscription list.
Login to your WordPress admin panel. From the menu choose “Appearance > Widgets” and the “Coupons in Your Inbox” widget. Drag & drop it into any one of the sidebars.
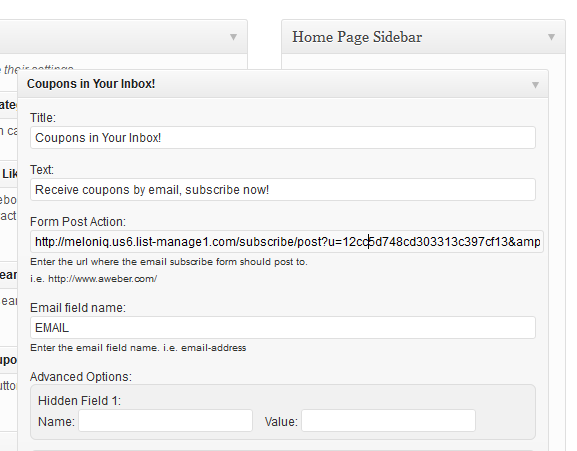
In the “Form Post Action” field, enter the form URL you copied from MailChimp. Enter “EMAIL” in the “Email field name” field. Click the “Save” button to save changes and visit your homepage. Your widget is ready to use!
Create a Campaign
At this point, visitors can now sign up to receive emails. But how do they get them? We’ll set that up now. We assume that you have created a MailChimp account, created a subscription list, and configured the subscription widget in your Clipper theme. If not, please follow the steps above first.
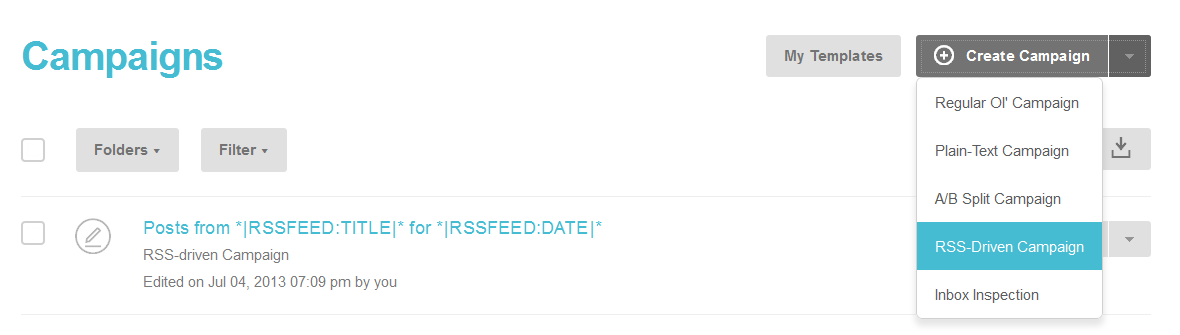
In your MailChimp account, from the left sidebar choose “Campaigns” and find the “Create Campaign’ button. Expand the drop-down menu on the button and choose “RSS-Driven Campaign” as shown on the image below.
Adding your website RSS URL
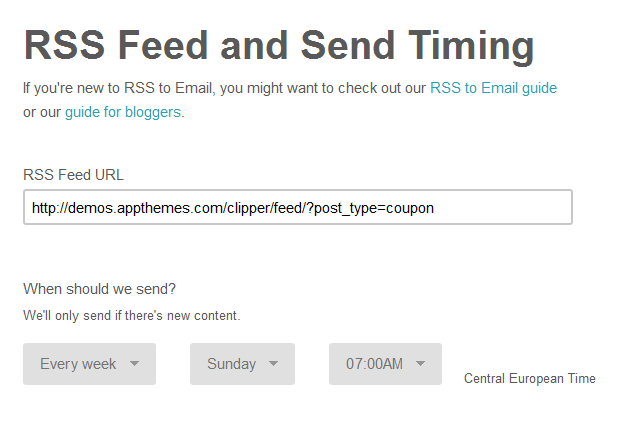
In another browser tab, open your Clipper site and copy the RSS URL (icon in the right top corner), as shown on the image below.

Back to the tab with MailChimp, paste the RSS URL into the field marked “RSS Feed URL”.
In the fields below specify frequency and time when the newsletter should be delivered. I have chosen ‘Every week’, ‘Sunday’ and ‘7AM’. This way, my visitors will receive the newsletter during Sunday morning coffee, right before they head out for shopping.
When completed, click the ‘Next’ button. It will take you to the page where you can choose the ‘subscription list’ you created earlier.
Campaign details
On the next page you can specify details of your Campaign, like “Campaign name”, “Email subject”, etc. You can also connect your campaign to Twitter, Facebook, Google Analytics, and much much more. When you are done, click the ‘Next’ button.

Making the emails look good
On the next page you will create a template for your newsletter. There are many options – choose the option you like the most. I have selected the ‘Predesigned’ option and the ‘Coupon 2A Slim’ template.
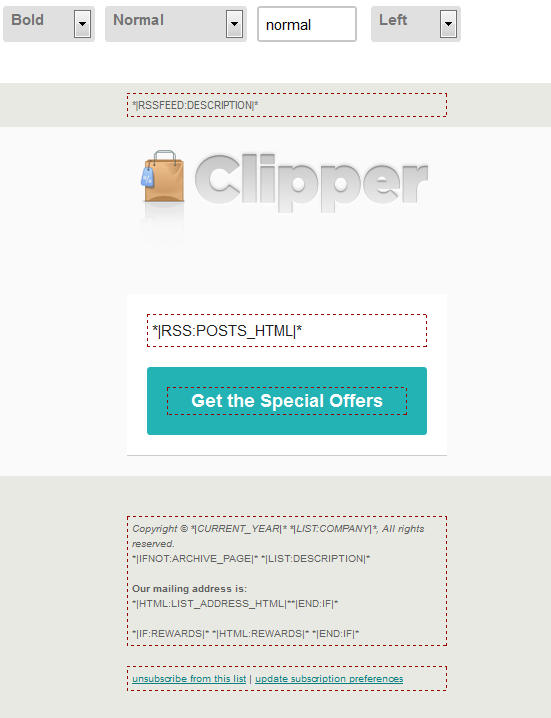
A template editor will show up where you can adjust all the layout elements. You want to make sure you organize some place to display the coupons from your site. When you have decided on a spot, enter the tag ‘*|RSS:POSTS_HTML|*‘, like in the image below.
If you have missed some information, MailChimp will let you know on the Confirmation page.
That’s it! You’re finished!
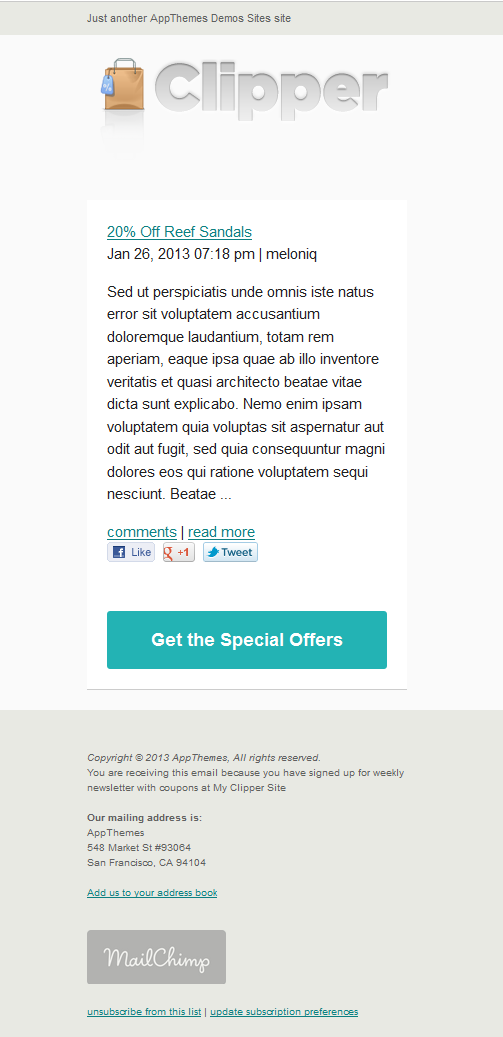
This is what our subscribers will find in their mailbox.
More Info
For even more info, you may also want to read the RSS to Email tutorial provided by MailChimp.
You also might want to check our tutorial about How to Auto Post to Social Networks … just in case you have missed that one.
Like this tutorial? Subscribe and get the latest tutorials delivered straight to your inbox or feed reader.