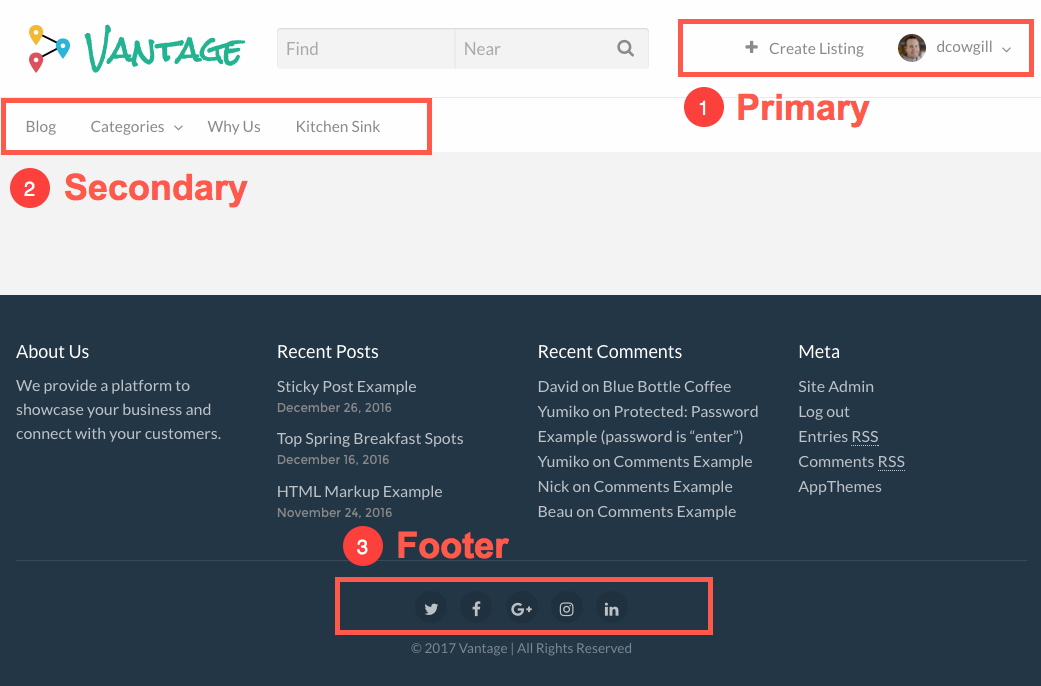
Vantage 4.0 uses three different menus Two for the top main navigation. One in the footer for social icons.
On new installs, your menus should already be setup correctly. If not, follow this tutorial on how to manually set it up.
Confirm Menus Are Setup
If not, you’ll need to manually create three new empty menus (Primary, Secondary, and Footer).
- Go to “Appearance” => “Menus” => “create a new menu”
- Give the menu a name
- Repeat until all three empty menus are created
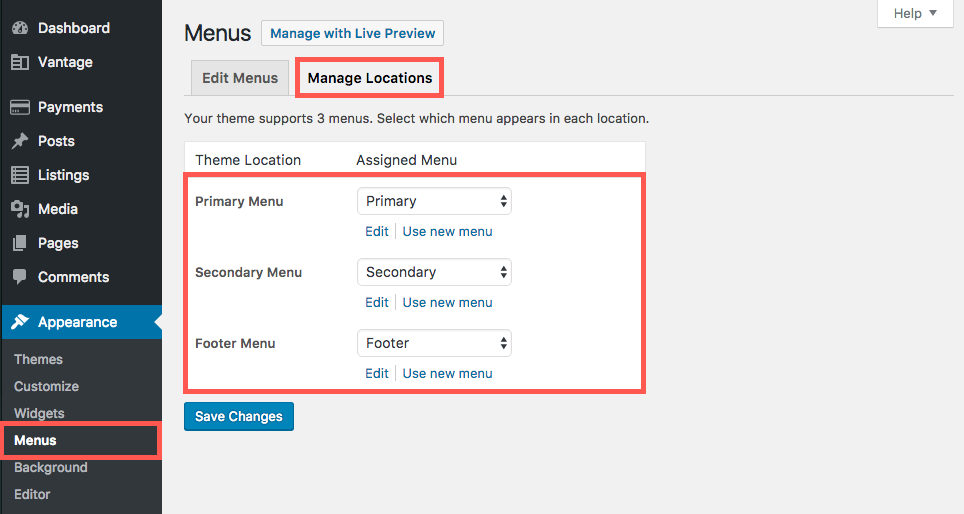
Assign Menu Location
- Go to “Appearance” => “Menus” => “Manage Locations”
- Select the correct assigned menu for each menu (see screenshot
- Save changes
Setup Primary Menu
In the above screenshot, you’ll see two menu items. “Create Listing” and a dropdown for the user logged in. If the user wasn’t logged in, you’d see “Login” and “Register” button (if registration is enabled. As of version 4.0.0, you cannot customize or move the login/register or user dropdown elements.
Let’s add the “Create Listing” link.
- Click on the “Edit Menus” tab
- Select “Primary (Primary Menu)” from the “Select a menu to edit” dropdown
- Click the “Select” button
- In the “Pages” panel, click the “View All” tab
- Scroll down and tick the “Create Listing” option
- Click the “Add to Menu” button
- Click the “Save Menu” button
<i class="fa fa-plus"></i> Create Listing |
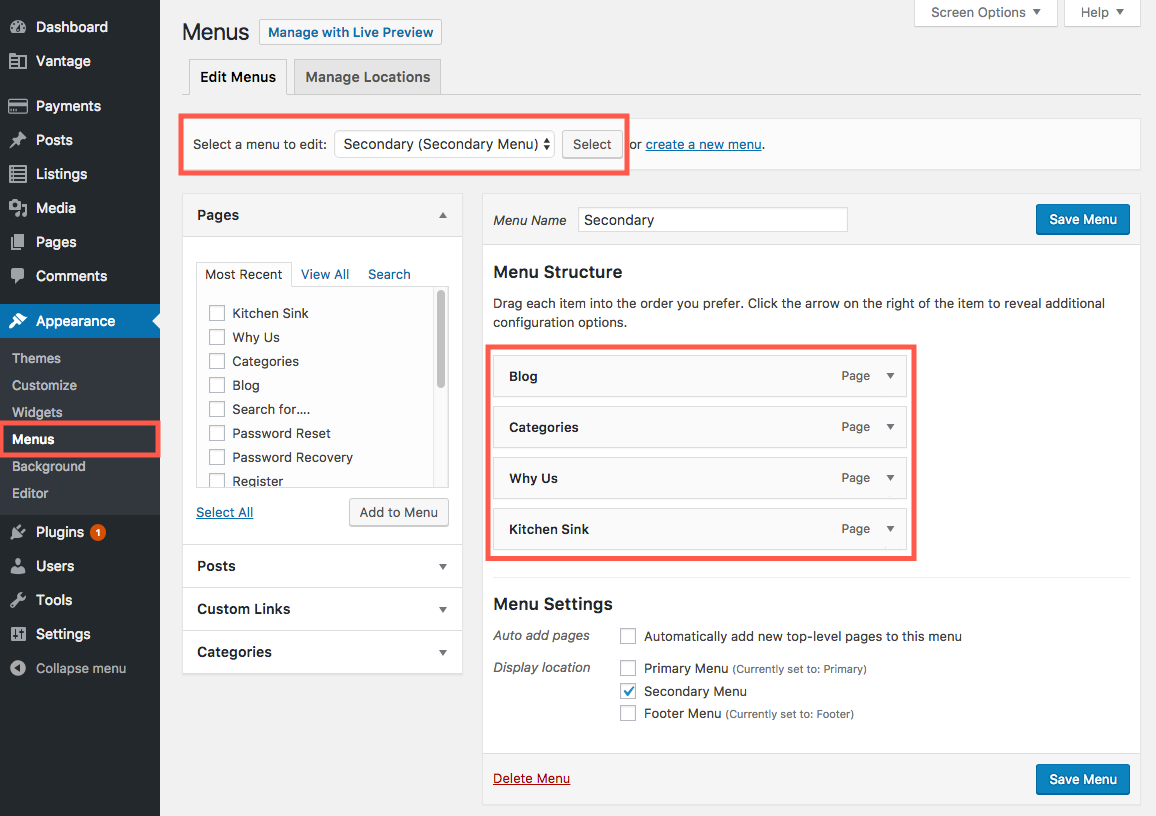
Setup Secondary Menu
You can add whatever pages you like here. See the screenshot for the pages our demo site uses.
We basically follow the same steps as above.
- Click on the “Edit Menus” tab
- Select “Secondary (Secondary Menu)” from the “Select a menu to edit” dropdown
- Click the “Select” button
- Expand the “Pages” panel, click the “View All” tab
- Scroll down and tick a page to use
- Click the “Add to Menu” button
- Click the “Save Menu” button
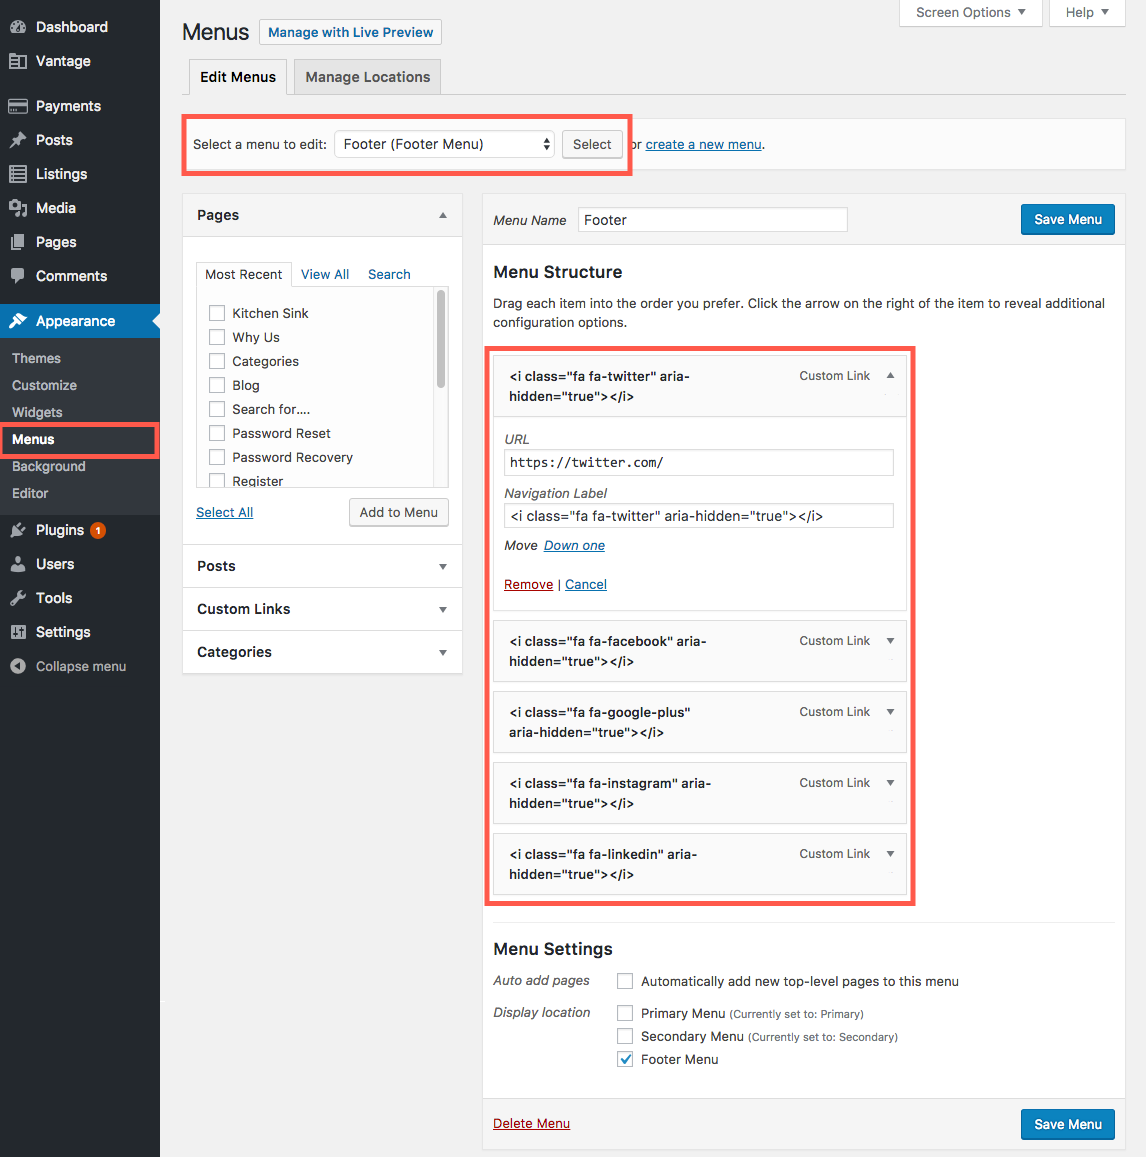
Setup Footer Menu
Let’s add a custom link for Twitter.
- Click on the “Edit Menus” tab
- Select “Footer (Footer Menu)” from the “Select a menu to edit” dropdown
- Click the “Select” button
- Expand the “Custom Links” panel
- Enter the social media URL (e.g. https://twitter.com/)
- Enter the Navigation Label
<i class="fa fa-twitter" aria-hidden="true"></i>
- Click the “Add to Menu” button
- Click the “Save Menu” button
Repeat all steps again for each and every social media icon you wish to add. To save you time, here’s a list of what we use on our demo site.
https://www.facebook.com/ <i class="fa fa-facebook" aria-hidden="true"></i> https://plus.google.com/ <i class="fa fa-google-plus" aria-hidden="true"></i> https://www.instagram.com/ <i class="fa fa-instagram" aria-hidden="true"></i> https://www.linkedin.com/ <i class="fa fa-linkedin" aria-hidden="true"></i> |
Like this tutorial? Subscribe and get the latest tutorials delivered straight to your inbox or feed reader.