In this tutorial, we’ll translate a few text strings in our Stripe Payments Gateway plugin into German.
Our plugins are all in English but are designed to be translated into any language. Just like our themes, they include a language file (.pot) that contains the text strings which is what needs to be translated.
There are many ways to translate a WordPress plugin. The most popular is using a program called, PoEdit. It works great but there’s a steep learning curve for those who are not tech savvy (install the software, download the .pot plugin file, create a new project, translate text strings, export a .mo file, upload the file to a specific spot on your server, etc). We wrote a separate tutorial on how to do that for our themes.
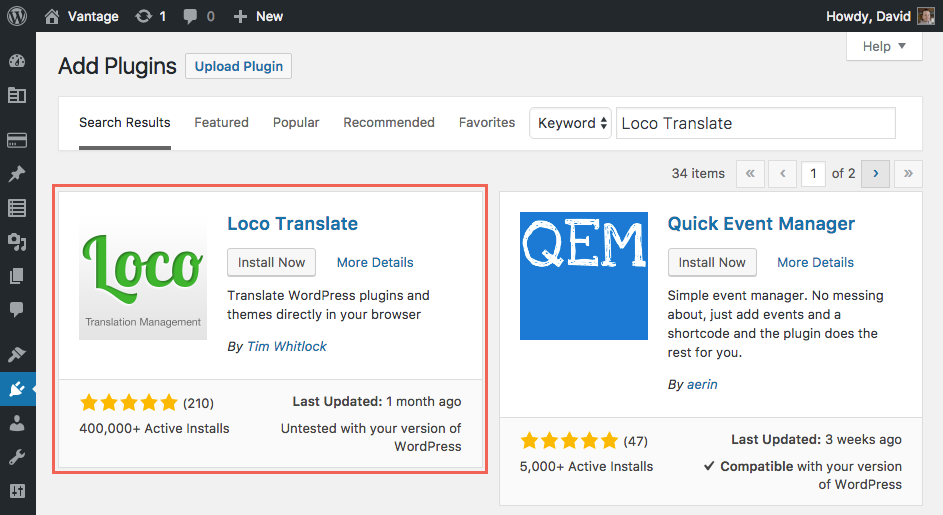
The best and easiest solution we’ve come across doesn’t require any separate program or translation file to upload to your website. It’s all handled gracefully and automatically from within wp-admin. It’s a free plugin called Loco Translate by Tim Whitlock. They also have paid plans (a monthly subscription which is silly…it should just be a one-time fee) but if you’re only translating a couple of plugins, you won’t need it.
It took me no longer than five minutes to translate a few text strings and have them working on my test website.
Step 1
Step 2
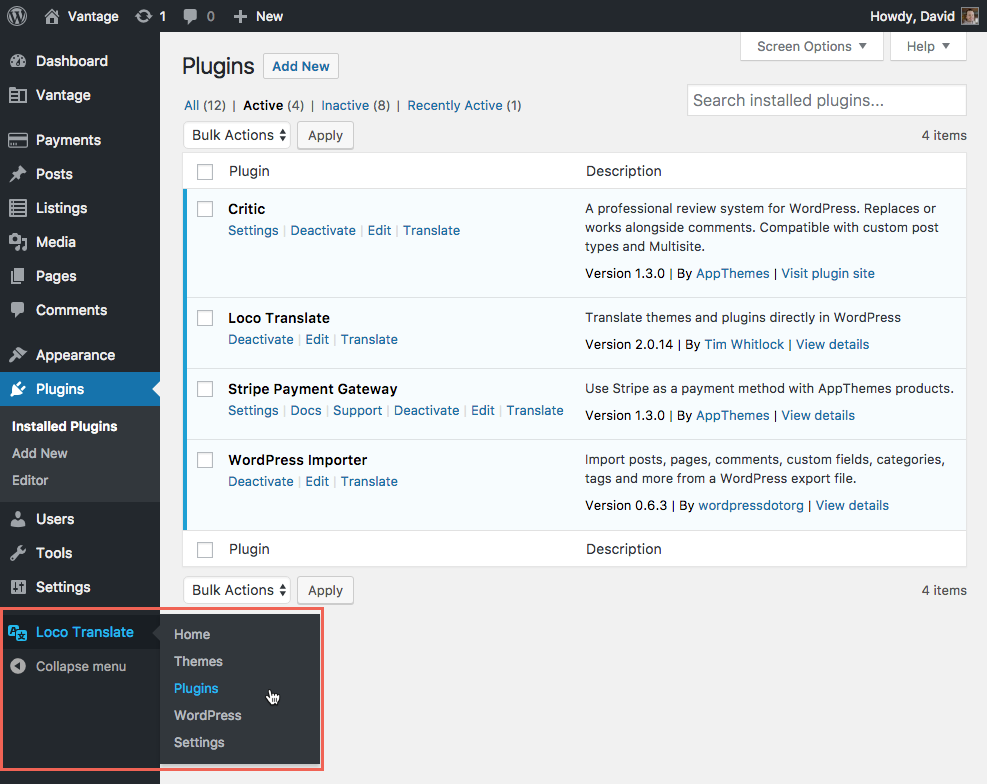
- Navigate to the “Loco Translate” sidebar menu and click on the “Plugins” link
- Click on the “Stripe Payment Gateway” (or whatever plugin you want to translate)
Step 3
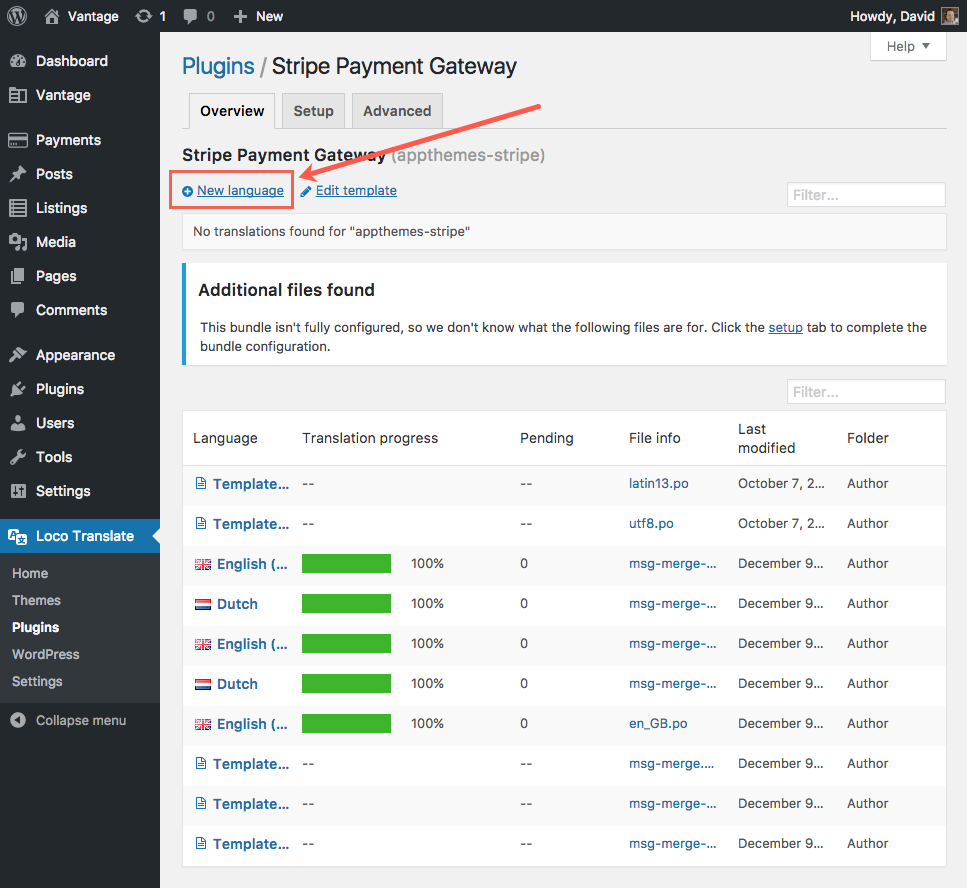
Step 4
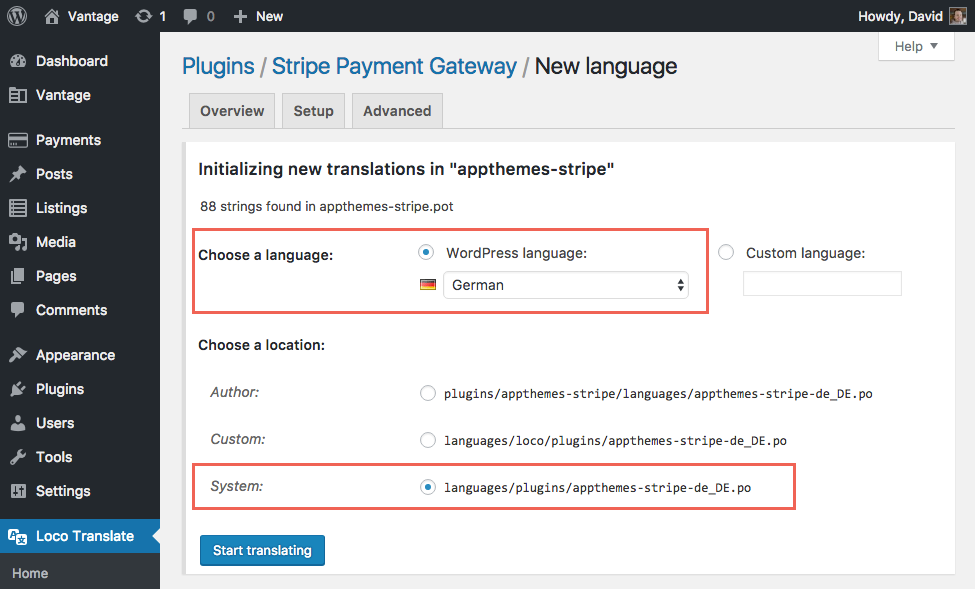
- Choose a language – What language you want to translate the text into. In our example, we want German. Select it from the “WordPress language” dropdown.
- Choose a location – Where to save your finished translation .po file. Make sure to select the “System” option. If you keep the default “Author” option, it’s saving it in the same folder as the plugin. That’s bad because the next time the plugin author updates the plugin, it will delete your .po file!
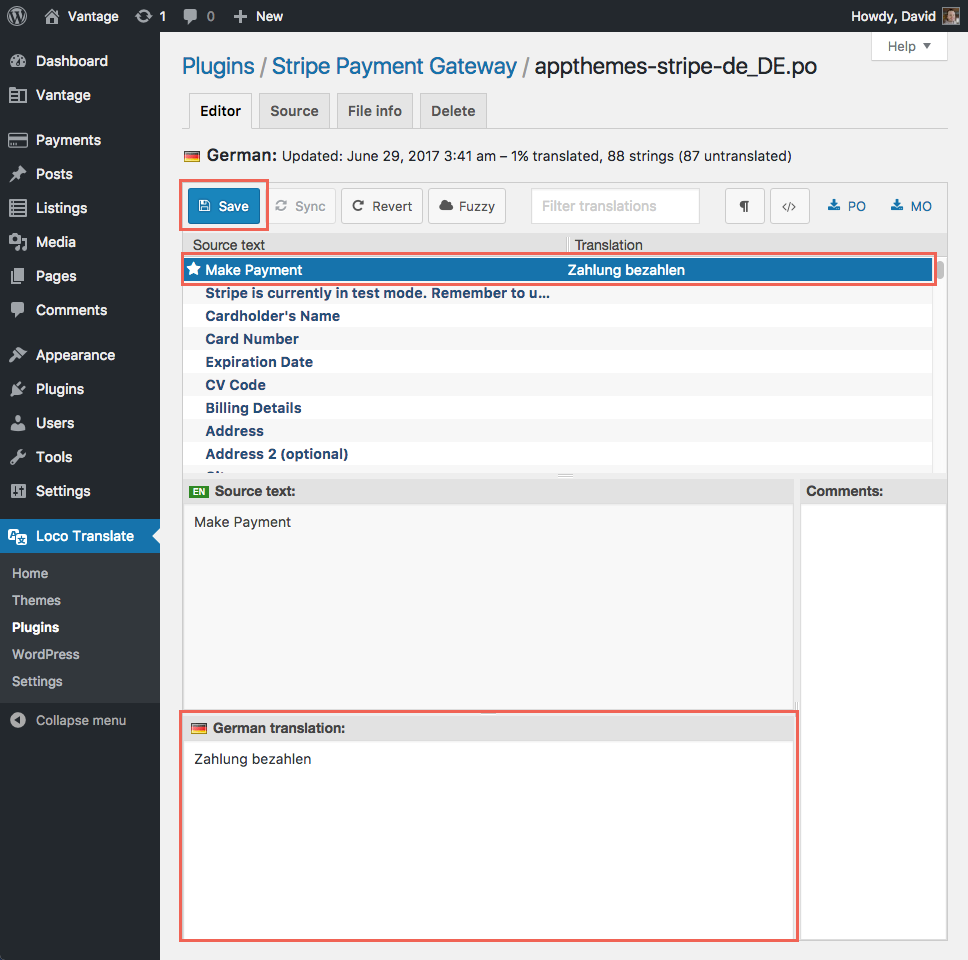
Step 5
- Below the “Save” button, click the “Make Payment” line in the “source text” column
- Go down to the “German translation” section and type in the German text for “Make Payment”
- Continue this process for each text string until all are translated to your liking
I recommend saving often just in case your browser crashes so you don’t lose all your work. Also, once you’re completely done, download the .po and .mo files so you have local copies (links in top right corner). If you switch web hosts or your site gets deleted, you won’t have to go through this again.
That’s it! Now go visit your website to where you expect that text to be translated. If not, see the FAQ section below or check out the Loco Translate guide to help troubleshoot.
FAQ
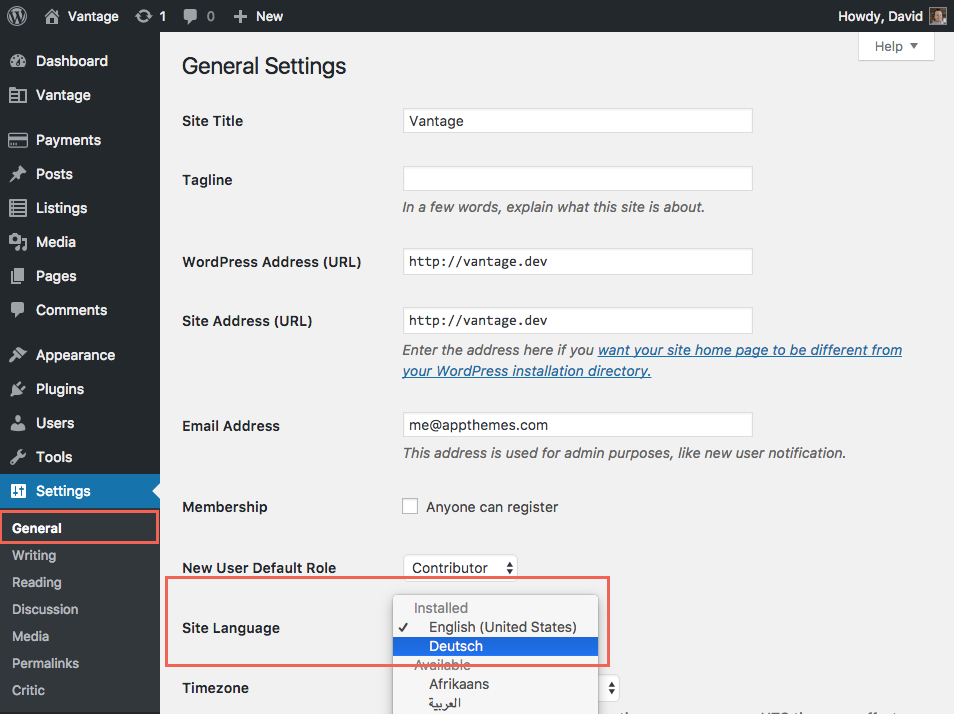
What if the text doesn’t show up translated?
You probably aren’t using that same language file for WordPress. Go in and set it correctly and then try again.
What happens when the plugin has an update?
Sometimes new text is added or removed when the plugin has a new version rolled out. It’s good practice to check after you update the plugin to see if there’s any delta.
Do this by going back to the edit language file and clicking the “sync” button for that specific plugin as shown in the screenshots below. If any new text is found, you’ll need to translate and save just like you did in previous steps.
Like this tutorial? Subscribe and get the latest tutorials delivered straight to your inbox or feed reader.