Sometimes it becomes necessary to manually change your theme directly from the database instead of via the WordPress admin. This is actually what we use when upgrading our admin demos since it’s much faster using the command prompt or phpMyAdmin.
Prerequisites
- Comfortable with either phpMyAdmin or command prompt to run SQL statements
- Some understanding of WordPress option values
Getting Started
There are three option_name rows in the database that need to be changed. These are what control which theme is currently active on your website.
- template – the “Theme Name” as defined in style.css
- stylesheet – the actual name of your theme folder
- current_theme -the actual name of your theme folder
Step 1
First let’s do a quick check and see what theme you currently have set. Note, this SQL assumes you have your tables named with the standard wp_ prefix. If that is not the case, you’ll need to change wp_options to whatever prefix your table structure uses.
SELECT * FROM wp_options WHERE option_name = 'template' OR option_name = 'stylesheet' OR option_name = 'current_theme'; |
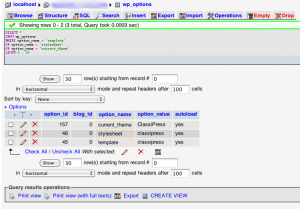
After running the SQL from within phpMyAdmin, you should see something like this:

Step 2
Now it’s time to change the theme. Figure out which one you’d like to switch to and change the three option_values = '' below. You’ll notice that the first option is capitalized which is important.
Once you’ve got your SQL code you’ll run it to change your current theme. (this example assumes you have ClassiPress already in /wp-content/themes/classipress/.
UPDATE wp_options SET option_value = 'ClassiPress' WHERE option_name = 'template'; UPDATE wp_options SET option_value = 'classipress' WHERE option_name = 'stylesheet'; UPDATE wp_options SET option_value = 'classipress' WHERE option_name = 'current_theme'; |
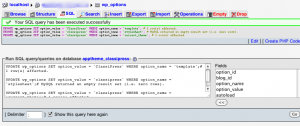
After running that SQL from within phpMyAdmin, you should see a success message similar to this:

Step 3
Go back to your website and refresh. You should now see the new theme running.
Having Trouble?
If you get an error 500 page or a different error, it’s likely you didn’t use the correct values for the theme. Go back and make sure they are correct.
One common error occurs when you’ve got the same theme but with different folder names (i.e. classipress-31 and classipress-312). In this situation the “Theme Name” in style.css is the exact same so your “template” option_name should be “ClassiPress/classipress-312” instead of just “ClassiPress”.
If it’s still showing the old theme, clear your cache (if you use a caching plugin like WP Super Cache) and that should resolve it.
Get Out of Jail Free Card
If you’re in a bind and can’t get anything to work, just run this SQL from phpMyAdmin. It will reset your website to use the default Twenty Eleven theme (change your wp_ prefix if necessary).
UPDATE wp_options SET option_value = 'Twenty Eleven' WHERE option_name = 'template'; UPDATE wp_options SET option_value = 'twentyeleven' WHERE option_name = 'stylesheet'; UPDATE wp_options SET option_value = 'twentyeleven' WHERE option_name = 'current_theme'; |
Like this tutorial? Subscribe and get the latest tutorials delivered straight to your inbox or feed reader.


