Today I am going to teach you how to add Google directions service using the Google JavaScript v3 API to your Google Map. My examples will be using the map widget for Vantage, but the code could be used on any map with minimal differences. Without further ado, lets get started.
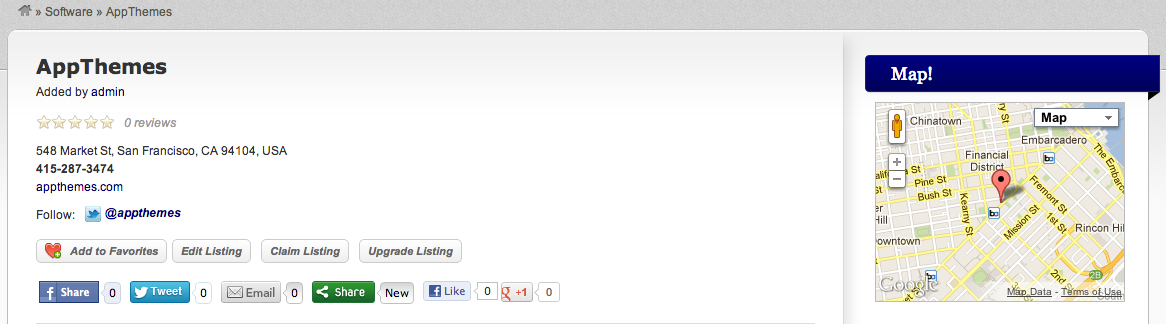
Here is the Map Widget as it is now, its just a map with a marker on it.
Before we proceed, remember to always create a child theme instead of modifying the theme core files. If you need help on this subject, read our child themes tutorial.
The Files
Here are the files I will be modifying (in Vantage):
- includes/widgets.php (This is where the HTML is generated for the map to be generated with)
- scripts/scripts.js (This is where the JavaScript is that renders the map)
- style.css (This is where the CSS styling for our map widget is and where we will put styling for our additions)
The HTML
First, we need to add some html to the widget itself, so lets open up includes/widgets.php, and near line 84, you will see this line:
echo html( 'div', $attr ); |
What we need to do is put a text input field for entering the “from” address, and then a button to trigger the action of generating the directions. This code will be put right after the code shown above.
I’ll be using the AppThemes utility function html(), but at the end I’ll show you the end result html generated so you can use that if you need to instead for uses in other places.
echo html( 'div', $attr ); // This will generate a label with an text input field within it. $html = html( 'label', array(), __('Get Directions From: ' , APP_TD ) . html( 'br' , array() ) . html( 'input', array( 'type' => 'text' , 'id' => 'directions_from' ) ) ); // This will generate a input button $html .= html( 'input', array( 'type' => 'button', 'id' => 'get_directions', 'value' => 'Get Directions' ) ); // This will generate a div, with the above generated html within it. echo html( 'div', array('id'=>'directions_from_address'), $html ); // This will generate an empty div, for use by the Google JavaScript directions api which will populate this div with the textual directions. echo html( 'div', array('id'=>'directions_panel') ); |
This is what the outputted html will look like:
<div id="directions_from_address"> |
The JavaScript
Now, for the JavaScript, we will now modify scripts/scripts.js, right around line 152 look for this code:
function vantage_map_view() { var mapDiv = jQuery('#listing-map'); if ( !mapDiv.length ) return; function show_map(listing_location) { var map = new google.maps.Map(mapDiv.get(0), { zoom: 14, mapTypeId: google.maps.MapTypeId.ROADMAP }); var marker = new google.maps.Marker({ map: map }); map.setCenter(listing_location); marker.setPosition(listing_location); } ... |
We will add in the JavaScript that sets up the directions service and make a few small tweaks.
Right under these lines:
if ( !mapDiv.length ) return; |
Add this:
var marker; var map; var directionsDisplay = new google.maps.DirectionsRenderer(); var directionsService = new google.maps.DirectionsService(); |
Then, under what you just added, add this:
This will hook into the "Get Directions" input button generated, and will call the directions api when the button is clicked passing the value entered in the "Get Directions From" input field generated.
jQuery('#get_directions').click( function(){ var start = jQuery('#directions_from').val(); var end = jQuery('li.address').text(); // This is the address for the listing var request = { origin:start, destination:end, travelMode: google.maps.TravelMode.DRIVING }; directionsService.route(request, function(result, status) { if (status == google.maps.DirectionsStatus.OK) { directionsDisplay.setDirections(result); marker.setVisible(false); } }); }); |
Next, Find this code:
map.setCenter(listing_location); marker.setPosition(listing_location); |
And add these lines right below:
directionsDisplay.setPanel(document.getElementById("directions_panel")); directionsDisplay.setMap(map); |
Now this section will look like this:
map.setCenter(listing_location); marker.setPosition(listing_location); directionsDisplay.setPanel(document.getElementById("directions_panel")); directionsDisplay.setMap(map); |
Next, Find this code:
function show_map(listing_location) { var map = new google.maps.Map(mapDiv.get(0), { zoom: 14, mapTypeId: google.maps.MapTypeId.ROADMAP }); var marker = new google.maps.Marker({ map: map }); |
Now, take out the two "var" words, so it looks like this:
function show_map(listing_location) { map = new google.maps.Map(mapDiv.get(0), { zoom: 14, mapTypeId: google.maps.MapTypeId.ROADMAP }); marker = new google.maps.Marker({ map: map }); |
The CSS
Now, we are going to make our map widget a little bigger, and add some css for our newly added elements.
In style.css, look for:
#listing-map { height: 198px; margin-left:10px; border: 1px solid #C2C1C2 } |
Now change to be this:
(A little taller and wider, and smaller left margin)
#listing-map { height: 300px; width: 270px; margin-left: 5px; border: 1px solid #C2C1C2 } |
Next, below that, add the following CSS:
/* Give margins to our label, input field and button */ #directions_from_address { margin: 10px 0 10px 5px; } /* Make the directions_from input field be full width */ #directions_from { width: 260px; } /* Make the left margin of the directions_panel match the other divs so it lines up nicely */ #directions_panel { margin-left: 5px; } /* Style the button to match Vantage button styling */ #get_directions { font-size: 11px; font-weight:bold; font-style:italic; color: #666; border: 1px solid #CCC; -moz-border-radius: 5px; -webkit-border-radius: 5px; border-radius: 5px; padding: 5px 8px; margin:0 10px 0 0; background: #FFF; /* for non-css3 browsers */ /* * Why base64? * * In a nutshell, it's being used to render gradients and rounded corners together for IE9 and older. You can read more here: * http://www.appthemes.com/support/faq/#css-base64 */ background-image:url(data:image/svg+xml;base64,PHN2ZyB4bWxucz0iaHR0cDovL3d3dy53My5vcmcvMjAwMC9zdmciIHdpZHRoPSIxMDAlIiBoZWlnaHQ9IjEwMCUiIHZpZXdCb3g9IjAgMCAxIDEiIHByZXNlcnZlQXNwZWN0UmF0aW89Im5vbmUiPgo8bGluZWFyR3JhZGllbnQgaWQ9ImcyMzkiIGdyYWRpZW50VW5pdHM9InVzZXJTcGFjZU9uVXNlIiB4MT0iMCUiIHkxPSIwJSIgeDI9IjAlIiB5Mj0iMTAwJSI+CjxzdG9wIHN0b3AtY29sb3I9IiNGRkZGRkYiIG9mZnNldD0iMCIvPjxzdG9wIHN0b3AtY29sb3I9IiNFREVERUQiIG9mZnNldD0iMSIvPgo8L2xpbmVhckdyYWRpZW50Pgo8cmVjdCB4PSIwIiB5PSIwIiB3aWR0aD0iMSIgaGVpZ2h0PSIxIiBmaWxsPSJ1cmwoI2cyMzkpIiAvPgo8L3N2Zz4=); background: -webkit-gradient(linear, left top, left bottom, from(#FFF), to(#EEE)); /* for webkit browsers */ background: -moz-linear-gradient(top, #FFF, #EEE); /* for firefox 3.6+ */ } |
Final Outcome
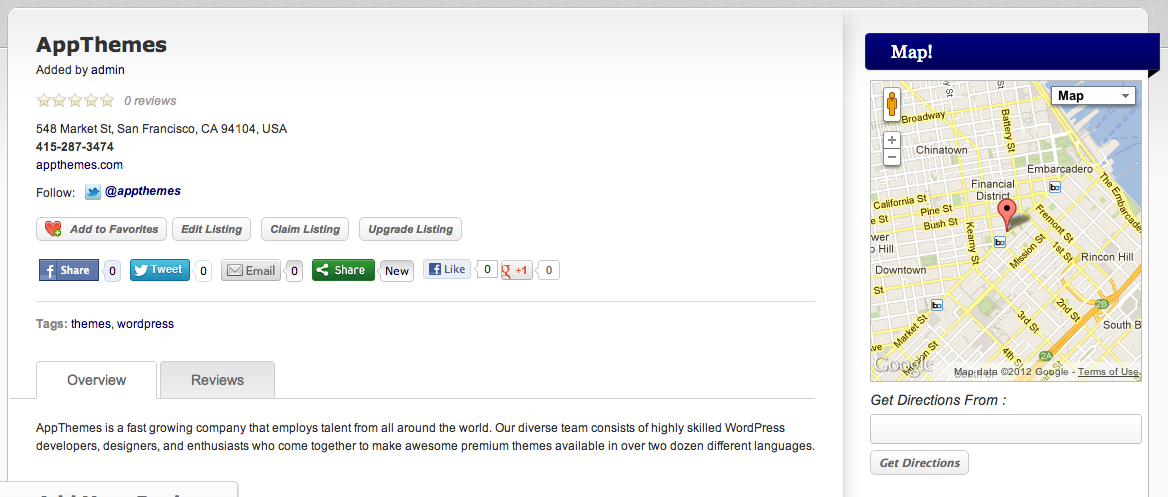
Here is the new map widget with the directions input field, and button, and enlarged map size:
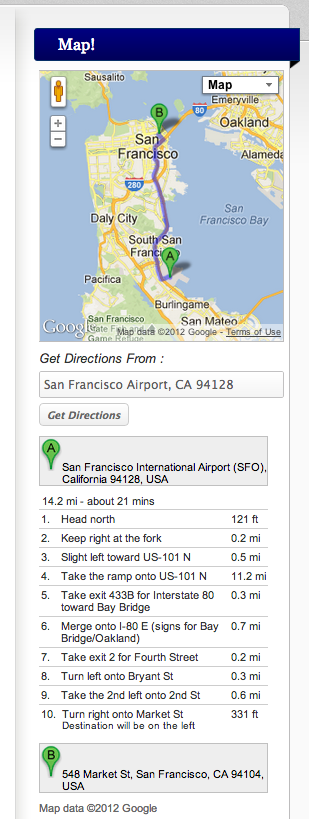
And here is what the directions service output looks like:
Like this tutorial? Subscribe and get the latest tutorials delivered straight to your inbox or feed reader.