Your Marketplace item page is a place to pitch and sell your product. Remember, you’re potentially competing with other sellers so invest the time to create high quality content and product screenshots.
A solid overview of your item with bullet points and great screenshots will always sell better than those without. Describe your item in as much detail as possible. This will help you sell more and answer less questions via comments.
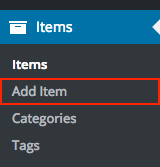
Add a New Item
From the wp-admin sidebar, click on the “Add Item” link as pictured to the right. That will take you to the new item page.
Main Text
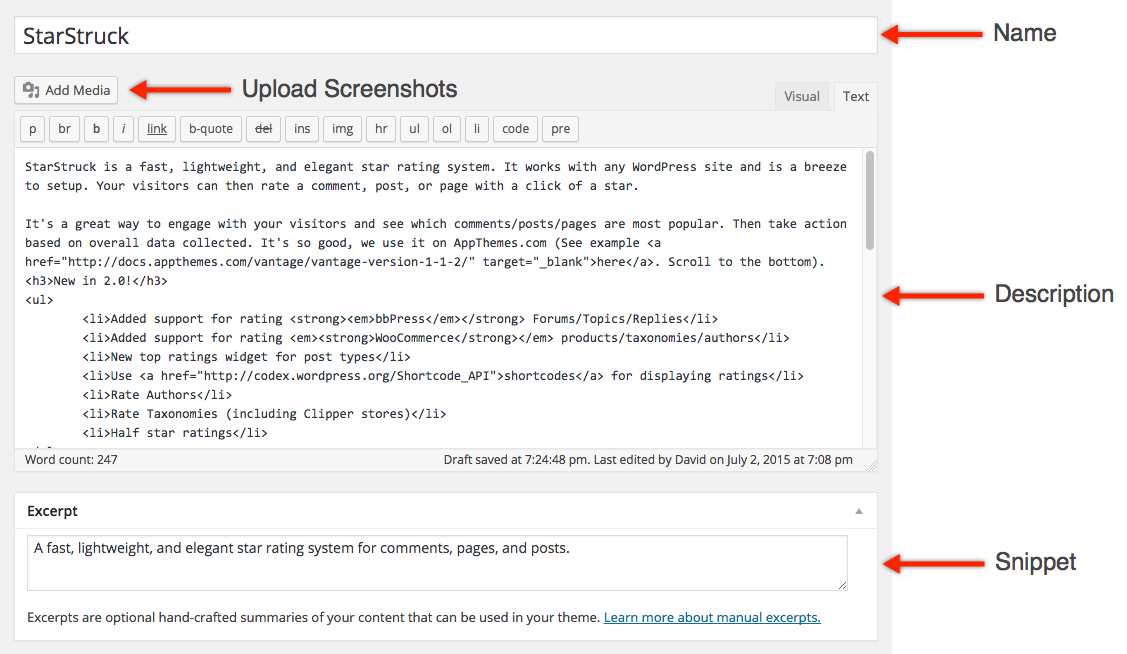
Description – Explain what your product does, how it can be used, why it’s worth purchasing, etc. It’s your main sales pitch.
Snippet – This is the short blurb that appears under your item in search results and on the main category pages. Keep it short and descriptive. It’s what draws people to click on your item.
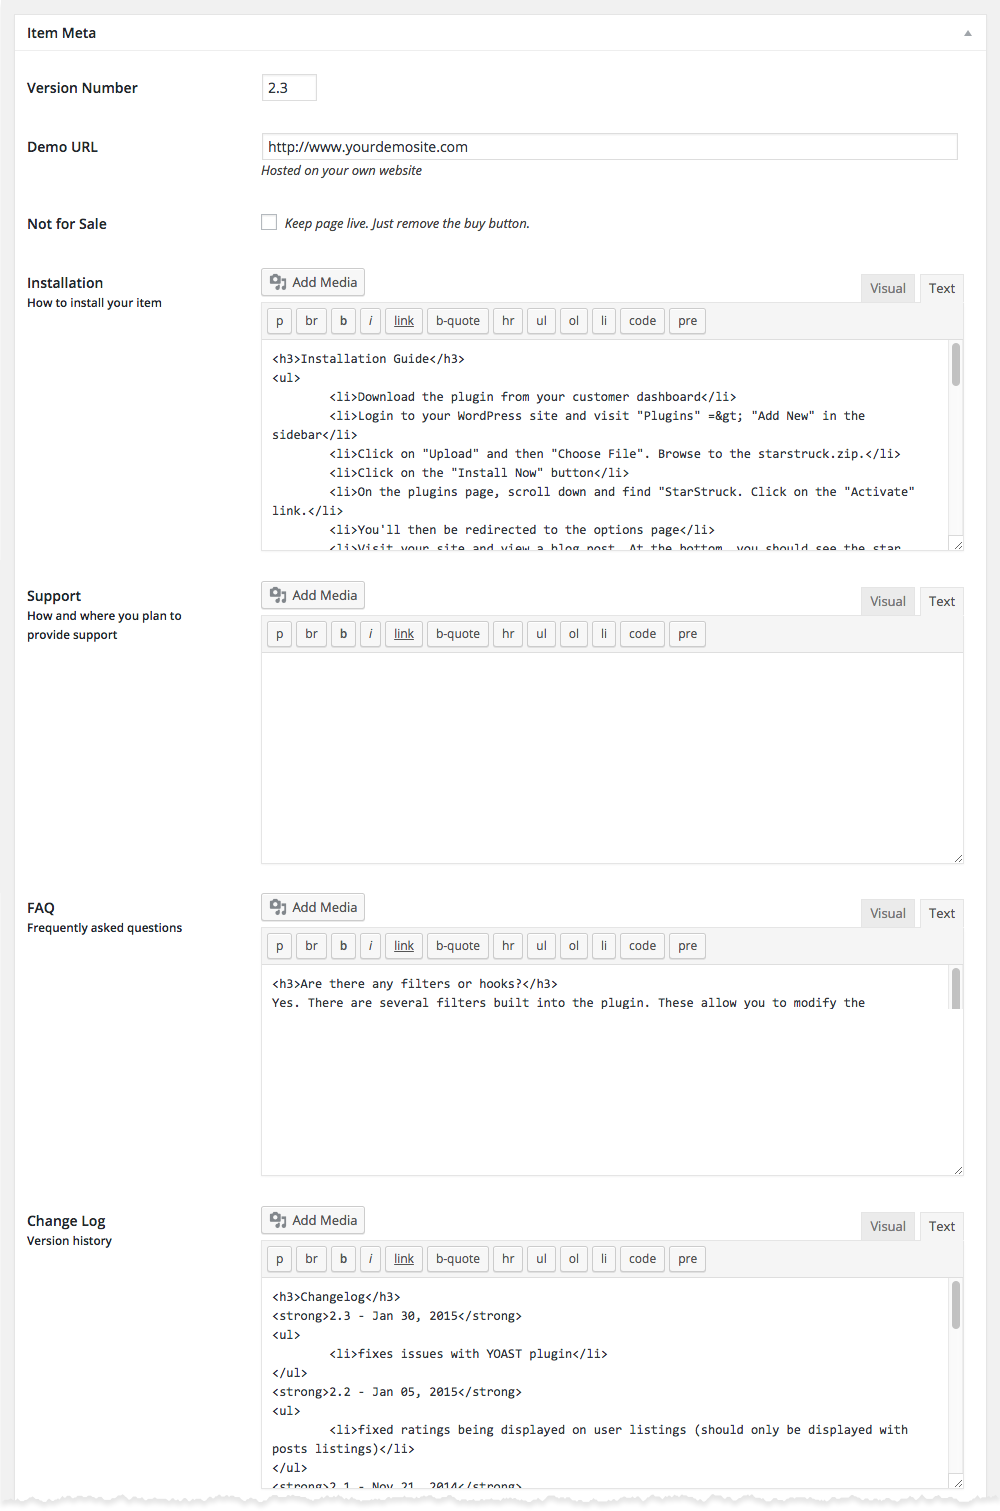
Item Meta
It’s important to fill as much of this in as possible. Each textarea section is viewed as a tab on your public page.
Version Number – The current version of your item. Make sure to update this whenever you release a new version.
Demo URL – A link to another website where people can view your item. A demo site is extremely helpful and increases your sales.
Not for Sale – If you want to take your item offline for a short period without removing your item’s page, you would check this box.
Installation – Explain how to install and configure your item. Most customers will come back here after they purchase your item to read.
Support – Explain how and where you will provide support for your item. If left blank, the default text will show pointing people to the AppThemes support forum we created for you (optional).
FAQ – List out as many questions you think potential customers may ask. You can always come back later and update based on questions via comments.
Change Log – Each time you release an update, you should come back here and list out all changes. This is very helpful to potential customers to see how active your item is and what’s been fixed/changed.
Item Tags
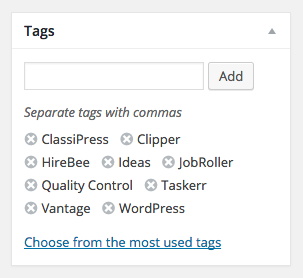
These tags are also visible on your item’s page under the “Requirements” sidebar section.
In other words, you should always have at least one tag. If you include the “WordPress” tag, it means your item is compatible with any WordPress theme or plugin.
Make sure to use proper camel case for each tag otherwise it won’t work properly. Tags should auto-complete when you type so just use the recommendation.
Core Tags
- ClassiPress – Supports the ClassiPress theme
- Clipper – Supports the Clipper theme
- HireBee – Supports the HireBee theme
- Ideas – Supports the Ideas theme
- WordPress – Supports any WordPress theme
- JobRoller – Supports the JobRoller theme
- Quality Control – Supports the Quality Control theme
- Taskerr – Supports the Taskerr theme
- Vantage – Supports the Vantage theme
Image Best Practices
Before you create your final images, please abide by the following best practices:
- Create your images as large as possible. It’s easy to scale them down later. Upscaling, not so much.
- Save your images as PNG (PNG-8 – Lossless) files. This offers the best quality/size for display.
- Don’t use keywords like, “ad”, “banner”, etc otherwise the image will be blocked by browser AdBlock plugins.
- Optimize your images before you upload them. This cuts down on the size without losing quality which means your images will load faster. We use OptiPNG via the command line but there are other available options as well.
- Use proper naming conventions. Not only will this make keeping track of your files easier, it helps with SEO too. For example, if your item is named, StarStruck, your images could be named:
- starstruck-main.png
- starstruck-options-page.png
- starstruck-dashboard-page.png
Add Images
Images are very important to have and really help to sell your item. The ideal number of image screenshots is 3-5 and they should all be high quality.
Make sure to spend the time to “stage” your item locally with real data before you take the screenshot so potential customers will get a much better feel of how it would actually look. Nobody likes boring empty screenshots.
Image Types
There are two main types of images you should include with your item.
- Product Screenshots – These are of your actual item in action. They should include front-end and back-end (option pages) shots. Size should be 1500px x 900px to support retina/hdpi displays. If your monitor isn’t big enough, try and get whatever the maximum size will allow. Just keep the proportions the same (1000px x 600px or 750px x 450px).
- Featured Image – This is just one branded image that’s shown on the home page, in search results and on the category pages. It should contain the logo and tagline with a limited number of other graphics. It’s essentially a summary of what your item is. Size should be 550 x 350px to support retina/hdpi displays.
Featured Image Example
Actual size

Scaled down 50% size for retina/hdpi support – this is what people will see.

Upload Screenshots
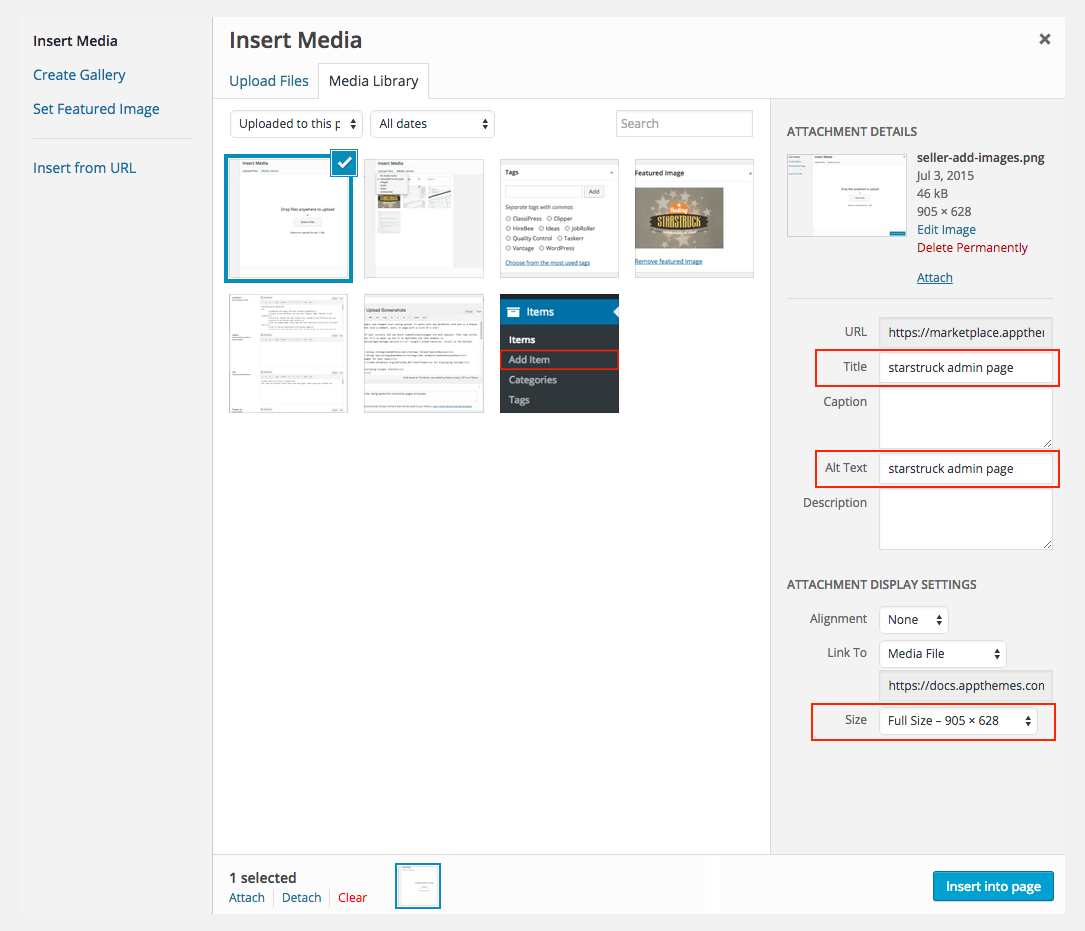
After you select your file and it uploads, you’ll then be presented with a screen similar to the right. Here you want to enter an image title and alt text. Both will help you with SEO so it’s important to enter a simple description about the image (i.e. StarStruck main image).
Leave the size drop down to the default “Full Size” so your item uses these dimensions.
If you made a mistake and want to delete the image, it’s easy to do. Just click on the red “Delete Permanently” link in the upper right corner under the image thumbnail (see screenshot to right).
Upload Featured Image
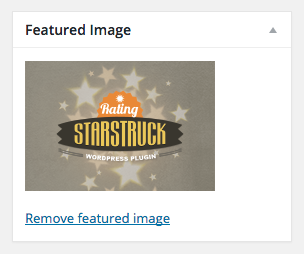
You’ll access the media uploader just like you did earlier for your screenshots. Follow the same steps, except you’ll want to click the “Set featured image” blue button (instead of click the X in the upper right corner).
Reorder Screenshots
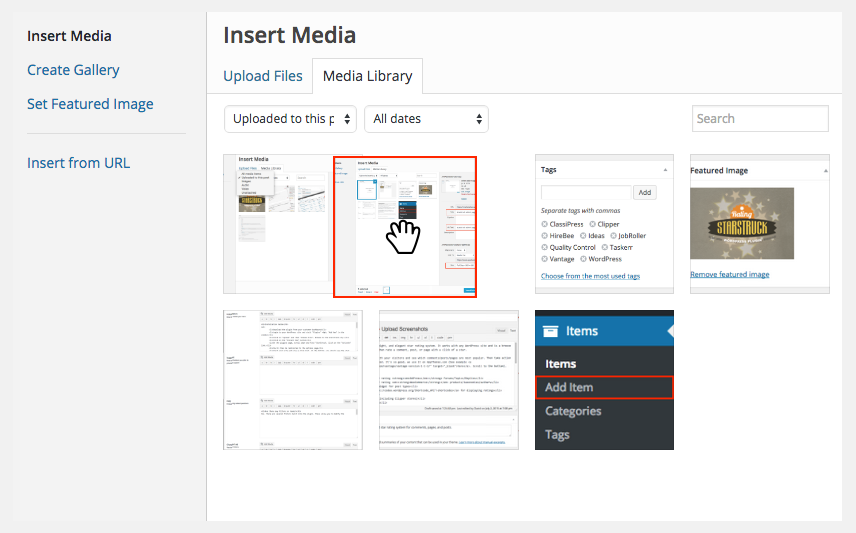
- Click “Add Media” underneath the title bar
- Choose the “Media Library” tab near the top
- Change the drop down menu to “Uploaded to this post”
- Drag and drop images to your preferred order
- Close the media window and click “Save as Pending” or “Update”
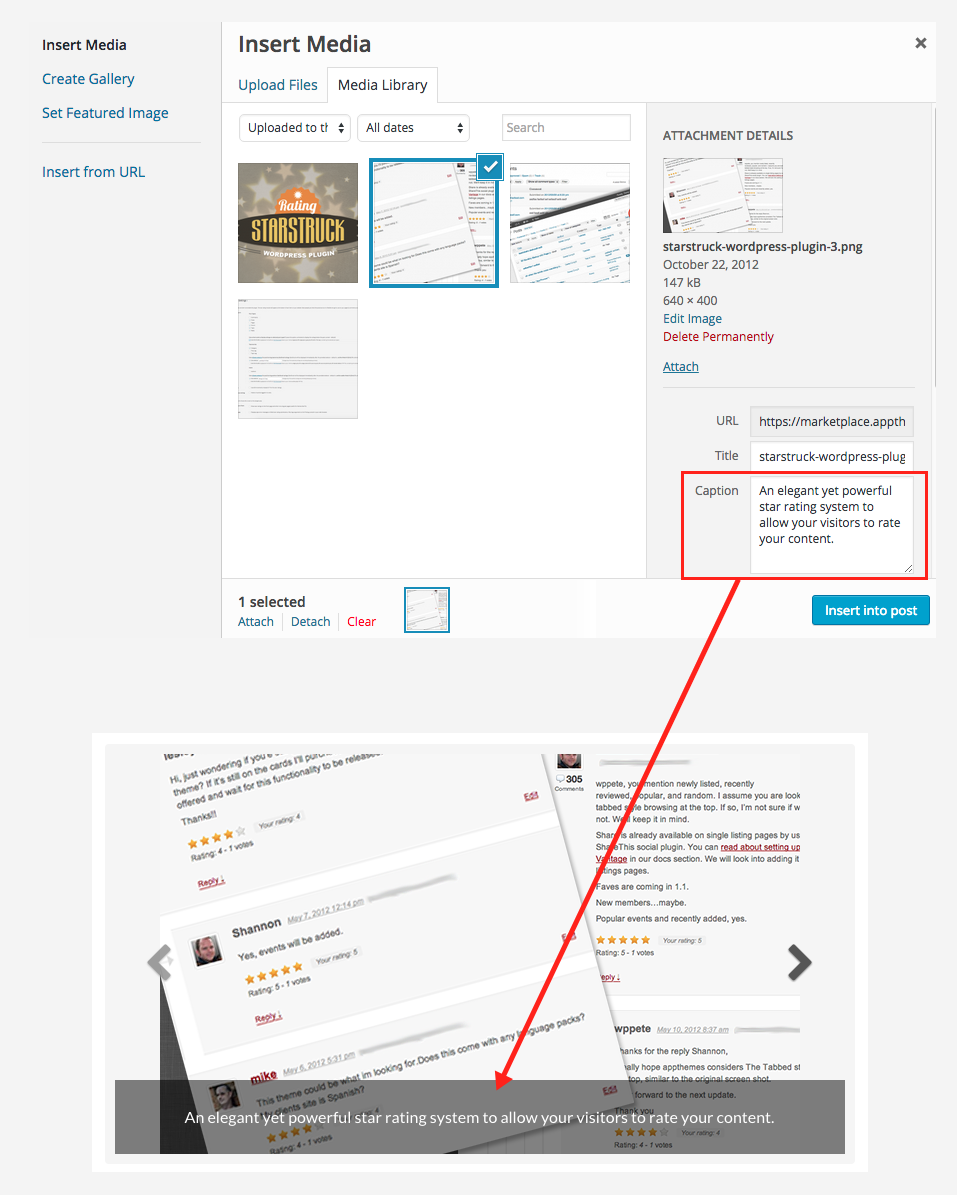
Add Captions
There’s a limit of 90 characters per each caption so keep your description short and sweet. Anything longer will be truncated with a “…”.
- Click “Add Media” underneath the title bar
- Choose the “Media Library” tab near the top
- Change the drop down menu to “Uploaded to this post”
- Select the screenshot you want to add a caption to
- Fill in the caption field and click into another field to save it
- Once you’re done, click the X in the top right corner to close the media box
Branding Guidelines
It’s very important to follow our company rules when it comes to proprietary naming. You may not use our company name in your items, however, you can include our product names within your item’s title and or screenshots (i.e. Super Ads for ClassiPress).
If you do include our product name(s), you must use the correct CamelCase spelling (i.e. ClassiPress not Classipress. JobRoller not Jobroller, etc).
Allowed HTML Tags
In order to keep a consistent look across all Marketplace items, we limit html tags to a set number. Anything not on the list below will be stripped out. No inline javascript or css is allowed as we don’t want flashing pink bold text on someone’s item page. 😉
Tags and Attributes
'a' => array( 'href' => true, 'rel' => true, 'rev' => true, 'name' => true, 'target' => true, ), 'b' => array(), 'blockquote' => array( 'cite' => true, 'lang' => true, ), 'br' => array(), 'code' => array(), 'del' => array( 'datetime' => true, ), 'em' => array(), 'h2' => array( 'align' => true, ), 'h3' => array( 'align' => true, ), 'h4' => array( 'align' => true, ), 'h5' => array( 'align' => true, ), 'h6' => array( 'align' => true, ), 'i' => array(), 'img' => array( 'alt' => true, 'align' => true, 'border' => true, 'class' => true, 'height' => true, 'hspace' => true, 'longdesc' => true, 'vspace' => true, 'src' => true, 'usemap' => true, 'width' => true, ), 'li' => array( 'align' => true, 'value' => true, ), 'ol' => array( 'start' => true, 'type' => true, ), 'p' => array(), 'pre' => array( 'width' => true, 'lang' => true, ), 'strong' => array(), 'strike' => array(), 'ul' => array( 'type' => true, ), |