The Stripe Gateway Plugin can be used along side Hirebee to offer Escrow payment functionality.
In this documentation you will find details on how to set up the Stripe gateway plugin on a HireBee website to enable the Escrow functionality.
An escrow service is where a third party receives and distributes funds on behalf of two other parties in the transaction process.
In terms of HireBee, the Stripe Escrow Functionality gives the employers (posting advertisements on your site) peace of mind. The escrow plugin ensures the payment made by the employer to the freelancer is held until the project is complete. The payment is held in the site owners Stripe account.

Limitation/Things to Consider When Using Stripe Escrow
The Stripe Escrow Plugin is only suitable for platforms that are providing to countries that Stripe supports.
The following currency limitation comes from Stripe.
Creating separate charges and transfers is only supported when both your platform and the connected account (freelancer account) are in the same region and using the same currency. For example, both in Europe or both in the U.S. If your platform is using USD your connected account will also need to be a USD account.
In HireBee, if your platform’s default currency is EUR, projects should be posted ONLY with budgets in EUR currency. The currency should also be the same for:
- Platform default currency
- Charge funds currency
- Transfer funds currency
The site owner does not have to worry about whether or not receivers (freelancers) already have accounts. Accounts can be seamlessly created within the escrow process (described below).
How Does the Stripe Escrow Plugin Work?
The Stripe Escrow functionality uses Stripe Connect as a solution for any businesses that need to process payments to multiple parties.
It uses Standard connected user accounts and Separate Charges and Transfers funds flow approach.
Step by Step Stripe Escrow Procedure
- An escrow involves three parties: the Platform (site), the Payer and the Receiver.
- The platform should be registered in the Stripe dashboard.
- The receiver should be connected to the Platform via site’s User form.
1) There should be a Stripe Connect button on the site user’s dashboard.
2) Users can create or connect their account.
3) After the user clicks the button on the dashboard, they’ll be taken to Stripe’s website where they’ll be prompted to allow or deny the connection to your platform. The user is redirected back to your site using Redirect URI parameter.
4) The platform creates a test transfer to the user account (using test API keys). This is to test the transfer ability of the receiver account and if so connection completes. Otherwise, Receiver will be prompted with the failure reason. - Payer purchases some product or service on the site and funds flow to the Platform Stripe account.
- If Payer changes his mind, he can ask for refund and funds goes back to Payer’s account.
- If the deal was made the funds held on the platform account can be transferred to the connected receiver’s account.
- The platform collects fees from the difference between the paid amount and transferred amount. Platform fees include the Stripe fees.
This means that: Your Clean Profit = Charged amount – Transferred amount – Stripe fees.
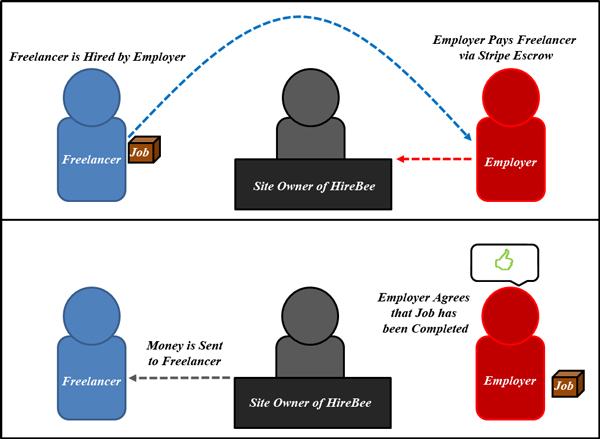
Graphic of How the Escrow Process Works
The following image displays how the escrow process works on a HireBee site.
Setting Up the Stripe Plugin for Escrow
Step 1) Ensure you install and activate the Stripe Gateway Plugin.
Step 2) In your WordPress dashboard, open the Payments Settings page, General tab, and find the Installed Gateways section. Enable Stripe (if disabled).
Step 3) Click on the Settings menu under Payments (of HireBee).
Step 4) You will see a tab titled Escrow. This tab along with the Stripe tab is where you will need to configure settings for this plugin.
Step 5) Log in to your Stripe account.
Step 6) In your Stripe account, click on Connect and then on Settings.
Step 7) Copy your Live and Test Client ID’s from your Stripe account and paste these in to the correct fields in the Stripe tab.

Step 8) In your Stripe account, below your client ID’s, set a Test AND Live URI. This is where your freelancer will be directed to after they have joined your escrow platform. For example: https://example.com/dashboard/payments/.

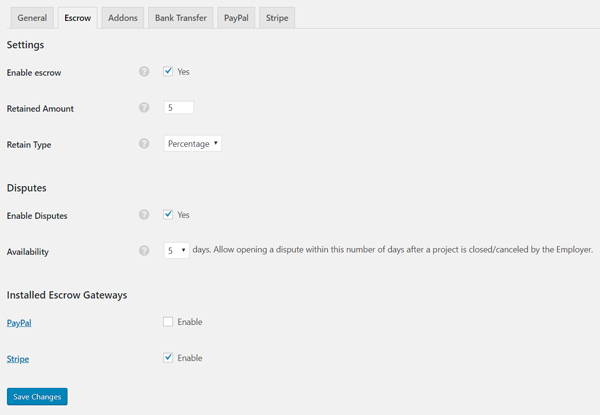
Step 9) Back in your WordPress dashboard, click on the Escrow tab (under Payments > Settings). Ensure the Enable escrow box is checked. Set Retained Amount and Retain Type. Keep in mind Stripe fees. Logically your Retained Amount should be greater than Stripe fees to have a positive profit from the deal. Ensure you Save Changes.
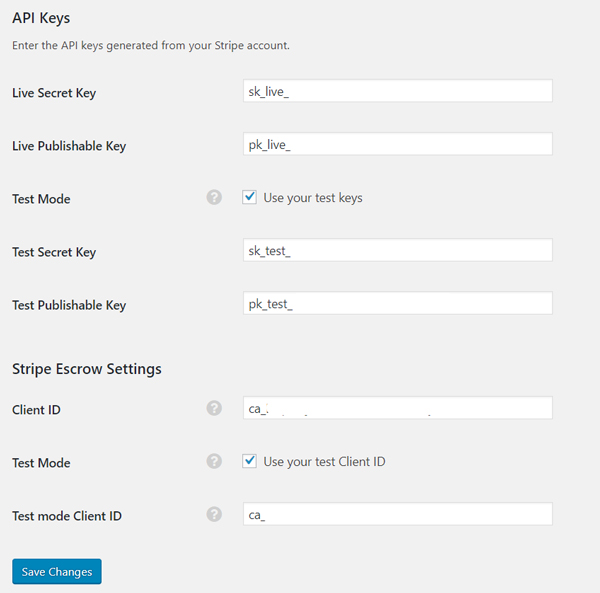
Step 10) Click on the Stripe tab. Ensure you have the following details set up under this tab:
- Live Secret Key
- Live Publishable Key
- Test Secret Key
- Test Publishable Key
- Client ID
- Test mode Client ID
You must have all those mentioned above in the correct fields for this plugin to work correctly. Keep in mind, that test API keys and Client ID are necessary for user connection since the platform makes a test transfer and checks the users. If there is no test keys, the user will not be able to connect to the platform.
Step 11) The plugin has now been configured. Enable the test mode to check the functionality. Disable the test mode when the site is ready for the public.
Setting up a Freelancer Escrow Account/Paying into an Escrow Account
How Do my Freelancers Make an Escrow Account?
Once the Stripe Escrow Plugin has successfully been set up on a HireBee site, your freelancers will be able to create accounts. Once they create an account, they will be connected to the Stripe Escrow system and will be able to be paid for contract work by potential employers.
By default, the Escrow Functions can be found by a user clicking on:
Step 1) Their user dashboard.
Step 2) Then on Payments.
Step 3) Then on the Escrow tab.
Step 4) Your Freelancers will need to fill in the details to create an account. This is where their payment will be sent to.

Step 5) Once your Freelancer has successfully set up their escrow account they will see the following message:
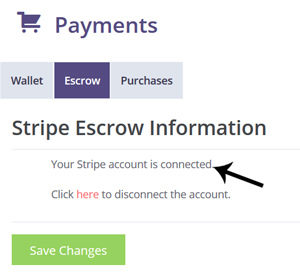
Your Freelancers can disconnect their account by clicking the word ‘Here‘ under the Escrow menu.
How do My Employers Pay to the Escrow Account
Once you have set up the Escrow feature on your site and your Freelancer has set up their escrow account, your Employer can now send payments.
(Please note the following documentation was completed in Stripe test mode).
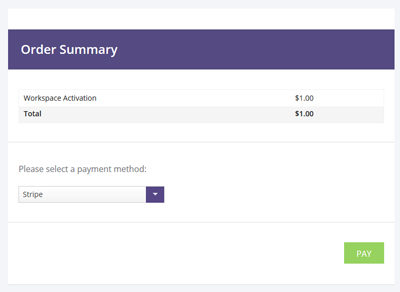
Step 1) Once an Employer and Freelancer have come to an agreement about a project, your Employer will see the following message before the project begins:

Step 2) Employers will need to pay the Freelancer the agreed fee by clicking the Transfer funds now button. The Employer will see the Order Summary and they will need to click the Pay button.
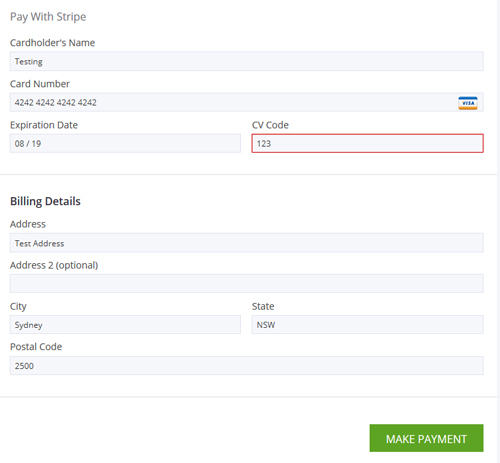
Step 3) The Employer will now need to enter their card details and address followed by clicking the Make Payment button.
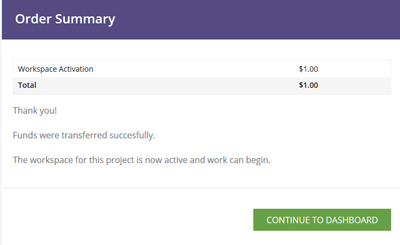
Step 4) The money will be transferred to the escrow account from the Employer.
Step 5) The site admin will now see that money is being held in the escrow account.

Step 6) Once the Freelancer has completed the job and the Employer agrees that the job has been Completed the money is automatically released from the escrow account.
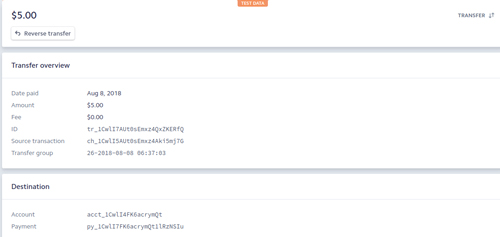
Funds in Escrow Account Transferred Screenshot
Refunds and Disputes
If the Employer does not confirm or cancels the deal, any funds paid to the escrow account will be refunded to the Employer.
If the Disputes feature is enabled in HireBee, admin decides what to do. If there is a dispute it is ultimately the admin of the site who decides where the funds should go. If the money should be paid to the Freelancer or if the money should be returned to the Employer.