Like most of our application themes, ClassiPress (our WordPress classifieds theme) allows you to charge for ads posted to your site. With ad and membership packages, and lots of other pricing options, ClassiPress gives you the power to create the pricing model that works best for you and your customers.
Once finished, your site will be ready to take payments from customers that want to list on your classified ads site.
Getting started
To begin, you will need ClassiPress – version 3.3 or newer – and WordPress installed on a hosting server. You will also want to read the “Getting Started with ClassiPress” doc to get ready.
In order to accept payments on your site, you will need to sign up with a payment gateway service. You will also need payment gateway software to complete transactions.
ClassiPress comes with PayPal and Bank Transfer as the default payment gateways. It’s free to sign up with PayPal and it is accepted in many countries around the world. If possible, we recommend starting with PayPal. You can sign up for an account at the PayPal website.
If you prefer not to work with PayPal or cannot get a PayPal account, AppThemes sells plugins for payment gateways in our marketplace. You can research and decide which is the best option for you.
Once you have ClassiPress added to WordPress and an account with a payment gateway, you’re ready to proceed.
Pricing Settings
If you are going to charge for listings, you want to enable this in ClassiPress. The default setting for this is “off”, you should go to the pricing settings panel to enable it.
In your WordPress admin, go to ClassiPress > Pricing. You should see the admin panel pictured below.
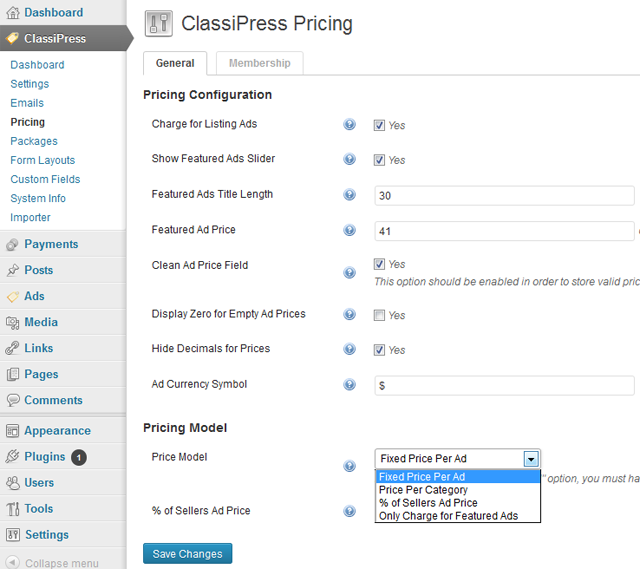
Make sure “Charge for Listings” is checked, you have selected “Pricing model” that is suitable for your site and customers, and click the “Save Changes” button.
Pricing Models:
- Fixed Price per Ad – One price for any ad, regardless of category. To use this pricing model, you will need to create at least one ad pack.
- Price per Category – Allows you to set different prices for ads listed in each category. Choose this option, click the “Save Changes” button and a “Price per Category” tab will appear.
- % of Sellers Ad Price – Price to list ad is calculated as a percentage of the price of the item advertised. For example, let’s say you choose this option and set the percentage to 1%. A customer wants to list their boat for $10,000 on your site. The customer would then pay $100 for the ad. If you choose this option, be sure to enter a value for “% of Sellers Ad Price”.
- Only Charge for Featured Ads – All ads are free. Customers are only charged if they opt to have their ad listed as “featured on home”. Make sure you have enabled “Featured slider” and set “Featured ad price” option
Additionally you can modify each of pricing models with “Membership packages”. For more info and instructions on setting up, read the tutorial on Setting Up Membership Packs.
At this point, ClassiPress is now set up to charge for listings.
Payments Settings
ClassiPress needs to know a few things about how you will charge for listings on your site. To set up these options, go to Payments > Settings > General tab. You should see something similar to the screenshot below.
Important note: when you make any changes on this tab, you should press the “Save Changes” button before you navigate to another tab or page.
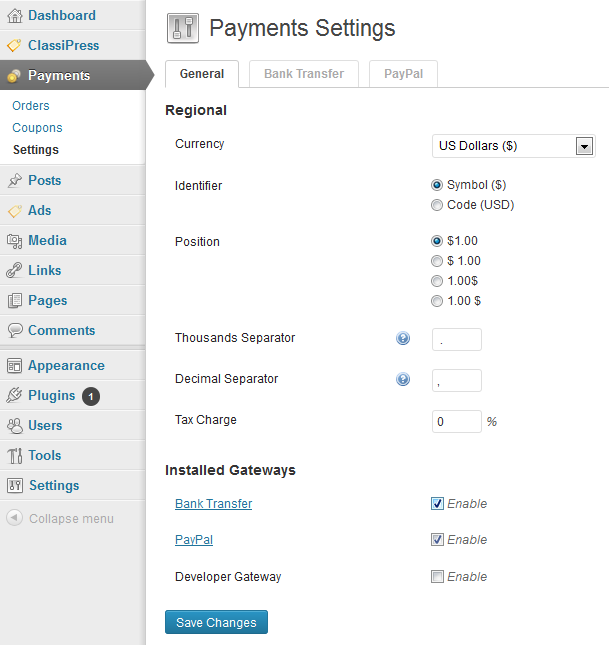
Regional
ClassiPress allows you to choose the currency used to collect payments on your site. At present, you can only have one currency at a time in ClassiPress. This is the place to choose your currency. Click the drop down next to “Currency Selection” to select your preference.
Since PayPal is bundled with ClassiPress, the default currencies in ClassiPress are the currencies supported by that payment gateway. If you have added other payment gateways, you should see the currency options for the currencies supported by each gateway.
Below the currency selection you will find more options like:
- Identifier – allows you to choose between currency symbol and code
- Position – determine where the identifier should be displayed
- Thousands Separator – change to meet your regional price formatting
- Decimal Sepatator – change to meet your regional price formatting
- Tax Charge – allows you to add regional tax to the listing or membership purchase price
Installed Gateways
This is where your installation of ClassiPress may differ from the screenshot above. ClassiPress will list, in this section, all of the installed payment gateways. If you have added more gateways, you will see them listed with “PayPal” and “Bank Transfer”.
To enable a payment gateway, simply check the “Enable” box to the right of that gateway. If you choose multiple payment gateways, ClassiPress will allow your customers a single choice from the gateways you have enabled. With more than one enabled, you give your customers the ability to determine the gateway that works best for them.
Additional Payment Gateway Settings
You will notice in the payments settings section of the WordPress admin that there is a tab for each installed gateway. You can click each tab to see the settings for that gateway. Each payment gateway will have it’s own settings and options.
Like this tutorial? Subscribe and get the latest tutorials delivered straight to your inbox or feed reader.