Posting new ads and listings to your social networks is a great way to attract more attention and traffic to your site. Thanks to dlvr.it, you can make this all happen automagically!
This tutorial will show how to use the social posting service dlvr.it to automatically post new ads to Facebook, Twitter, LinkedIn and more. Before we start, two notes. First, a big thank you to AppThemes member orangemedia for the tip on dlvr.it. Secondly, please keep in mind that dlvr.it is not associated with AppThemes. We have tested it with our themes but we do not guarantee it will work with your site. Got it? Great, let’s go!
Getting the Correct Feed URL
Dlvr.it works by taking the feed from your site and adding new posts to various social networks. Since AppThemes uses custom post types, we can easily separate the listings, ads or coupons feed from the normal blog posts feed. Here are the feed URLs for each theme:
- ClassiPress: http://www.yoursite.url/feed/?post_type=ad_listing
- Clipper: http://www.yoursite.url/feed/?post_type=coupon
- JobRoller: http://www.yoursite.url/feed/?post_type=job_listing
- Vantage: http://www.yoursite.url/feed/?post_type=listing
Let’s take a look at those URLs a little more closely with a couple of examples.
- If you have a ClassiPress site at www.superclassifieds.com, then the URL for the ads feed would be “http://www.superclassifieds.com/feed/?post_type=ad_listing”.
- Let’s say you have a site about quilting at www.quiltqrazy.net and ClassiPress installed in the subdomain “classifieds”. The URL would then be “http://classifieds.quiltqrazy.net/feed/?post_type=ad_listing”.
- Finally, how about an example of a Volkswagen enthusiasts site www.vwftw.com. In this case, the classifieds are in a folder titled “ads”. This URL would be “http://www.vwftw.com/ads/feed/?post_type=ad_listing”.
Hopefully, those examples are enough to give you the right idea. So how do you use the URL with dlvr.it? Keep reading.
Setting Up dlvr.it
Of course, if you’re going to use dlvr.it, you need to create an account. Dlvr.it provides their services free of charge and offers “promoted stories” for a fee. The free service is all you will need, so hop over to dlvr.it and sign up for an account.
First Run
After signing up, dlvr.it immediately puts you into the process of adding a feed. This is a “first run” process that only shows up right after you create an account. You normally administrate your feeds from the “Deliveries” section in dlvr.it.
Step 1
After you create your account, you will be asked to add a feed URL. This is “Step 1” of the first run set up. Using the guidelines above, add your own feed URL. In this example, I’m going to use http://appthemestest.com/classipress/feed?post_type=ad_listing.
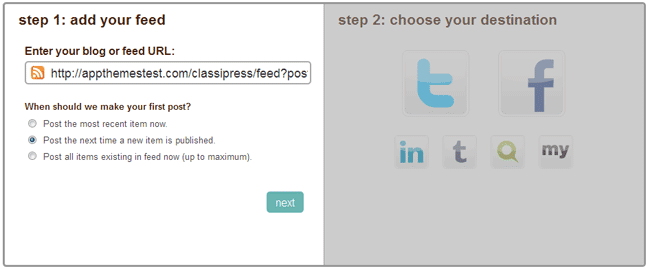
Next tell dlvr.it what you want posted after the feed is added. The options are:
- Post the most recent item now.
- Post the next time a new item is published.
- Post all items existing in feed now (up to maximum).
If your site already has a ton of ads, you might want to avoid “Post all items existing in feed now.” Although there is a maximum post limit, it’s going to push a ton of ads to your social networks all at once and it will also put you at your daily limit right away. I’m going to use “Post the next time a new item is published.”
Now that you have added the feed URL and set your first post option, it’s time to click the “Next” button to “Step 2”.
Step 2
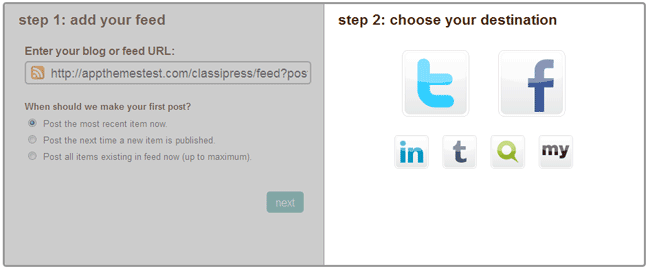
This is where you get to choose the destination for your posts. There’s no doubting what the most popular choices are – the Facebook and Twitter icons are enormous. Other options include LinkedIn, Tumblr, StatusNet and MySpace. We’ll choose Twitter for our example.
Authorization
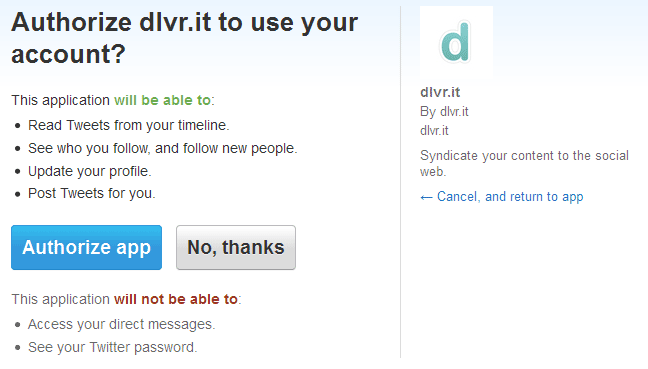
Since we have chosen Twitter, dlvr.it redirects us to the Twitter authorization page. Simply press the big, blue “Authorize app” button to allow dlvr.it to make tweets on your behalf. After receiving authorization, you will be redirected to the dlvr.it “Deliveries” section.
Managing “Deliveries”
After completing the first run, your settings will be handled in the “Deliveries” section of dlvr.it. The Deliveries section has two pages, “Routes” and “Destinations”. Routes control what posts will be posted and where they will be posted. Destinations are simply the social network profiles that you will post to. When you first arrive at the “Deliveries” section, you’ll see the “Route” that was created after sign up. Let’s edit it and add more social networks to this delivery.

Editing a “Route”
Routes have two parts, “Sources” and “Destinations”. Your “Source” shouldn’t need any changes at this point but you can refer to the help section at dlvr.it for more details. There are a lot of features like filters, scheduling and more.
Let’s focus on the other part of your current “Route”. On the right side of of “My New Route”, you will see “Destinations”. In our example, I have already added Twitter as a destination and I am going to edit that now by rolling over “Twitter – juusui” and clicking the pencil icon.

You will see that the “Account” tab is chosen. We can skip that.
Click the “Post Content” tab. Here you are able to edit what your Tweet will look like when posted to Twitter. You can choose to include the post title, body text and link. As you know, 140 characters is not much, so I’ll include “Post Title” and “Post Link”. In the “Prefix/Suffix” section, you can add text that will precede or follow the post info. In my example, I’m going to add “New ad:” to announce new ads on Twitter.
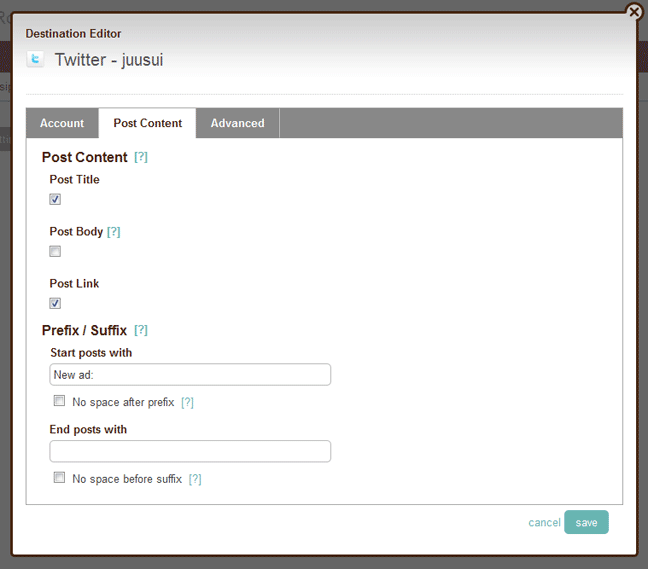
There are more options under the “Advanced” tab but we would advise reading the help documents at dlvr.it to learn more about the advanced settings.
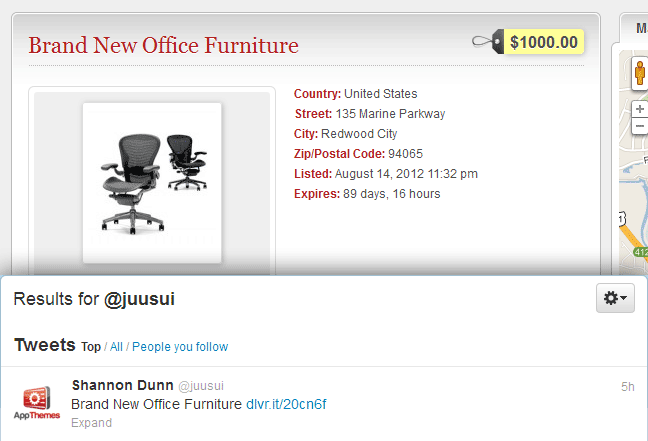
Finish off by clicking the “Save” button. Here’s an example of a tweet (ClassiPress ad on top and related tweet below).
Adding a “Destination” to a “Route”
So now we’re Tweeting our new ads, how about posting to Facebook or LinkedIn? Let’s add a Destination to “My New Route”. Under “My New Route” and next to “Destinations”, click the “+add” button.
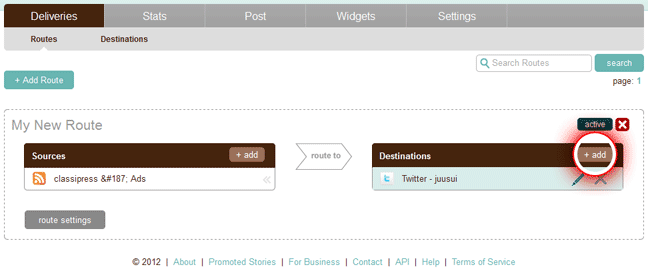
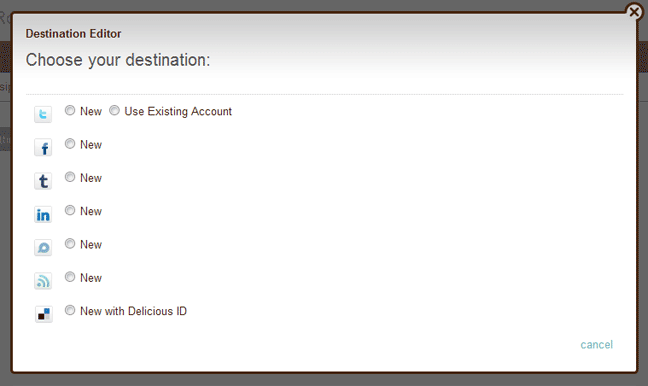
You should now be on the “Choose your destination” panel. Let’s add our new ads to Facebook by clicking the radio button next to Facebook.
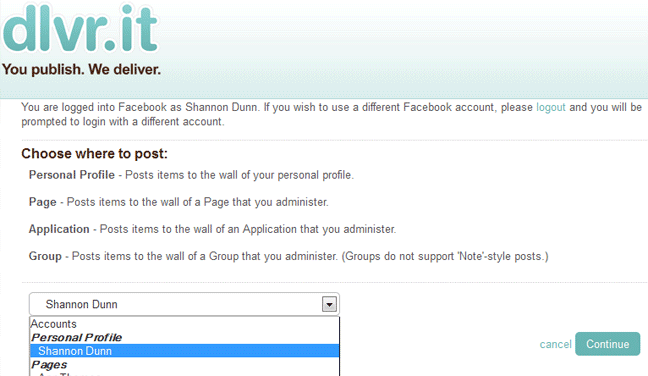
You will now be on the “Account” tab for Facebook. Click the “Connect to Facebook” button. A new window will open. If you are not logged into Facebook, the new window will contain a Facebook login. After logging in, you need to choose the profile, page, application or group to post to. For this example, I’m choosing my personal account. Click the “Continue” button the the “Close window” link. Under the “Account” tab, you can see the account is now active.
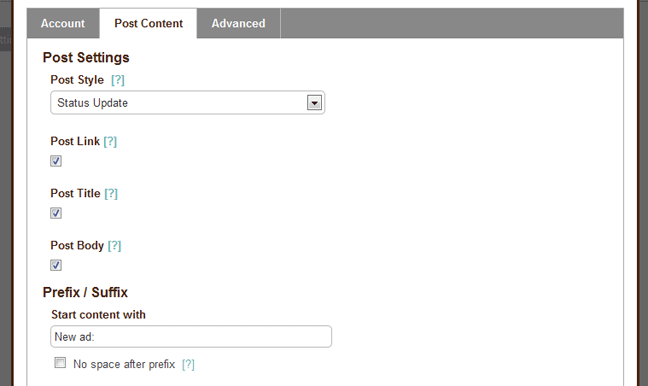
You can edit “Post Content” just like you did in the last section but there are slight differences for Facebook. You can check the documents at dlvr.it to learn more about these options. You can see the options I used below. Don’t forget to click the “Save” button.
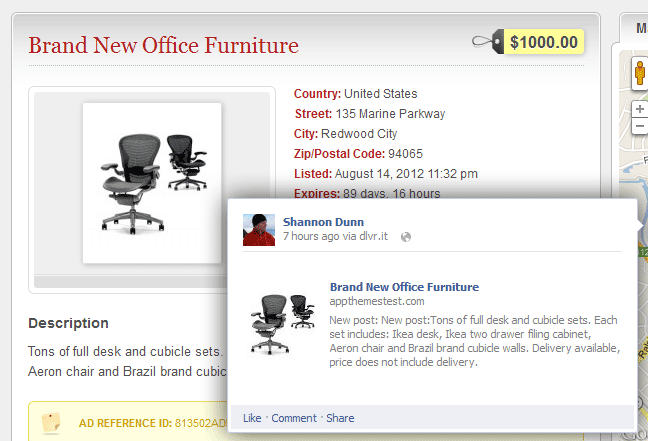
And this is the Facebook post that is created.
Aaand You’re on Your Way!
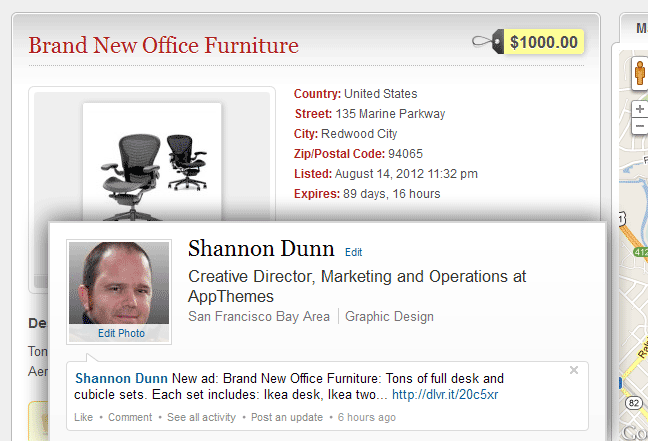
dlvr.it is certainly a useful tool for any AppThemes enabled site. As mentioned before, it also works with LinkedIn which would be great for JobRoller sites. It’s a really cool a tool that can definitely set your site apart from the rest. We suggest giving it a try.
By the way, here’s what a dlvr.it post looks like on LinkedIn.
Like this tutorial? Subscribe and get the latest tutorials delivered straight to your inbox or feed reader.
