This documentation should be followed after you have installed and activated the ClassiPress 4.x AppTheme for WordPress.
Through customization, ClassiPress is able to suit the design and style needs of a range of websites. Customizing the site identity (logo, title, tagline, footer copyright text and site icon), background image, color scheme, layout, menus and sidebars of your freshly downloaded ClassiPress enables you to create a site that represents your company.
Video Tutorial
Accessing the Customizer
To access the customizer of your WordPress account;
- Click the Appearance menu in your WP dashboard.
- Now click on Customize.
- This will bring you to the customizer (similar to the one below) needed to edit the appearance of your ClassiPress website.
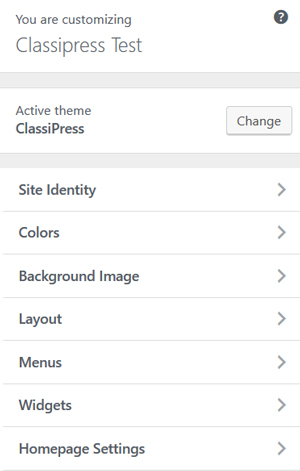
Site Identity
In the Site Identity menu of the WP customizer you can:
- Change/remove the Logo of the site
- Edit the Site Title
- Edit the Tagline

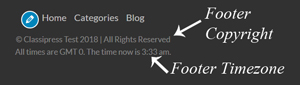
- Display the Timezone in the footer
- Edit the Footer Copyright
- Add a Site Icon (Site Icons are what you see in browser tabs, bookmark bars, and within the WordPress mobile apps).
![]()
Color Scheme
In the color scheme menu you can customize the main background color, header background color, header text color and choose a color scheme.
Example: Color Scheme
The following website is using the ‘Teal’ color scheme:

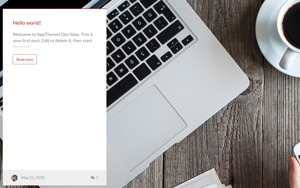
Background Image
From the Background Image menu of the customizer, you can select an image from your media library, or upload one to use as the background of your site. Ensure all text can still be read by your potential customers if you apply a background image.
Example: Laptop Background Image
Layout
Using the options within the layout menu you can:
- Alter the position of your Blog
- Alter the position of your Listing Search
- Alter the position of the Listings
- Alter the position of the User
Menus
The menus section of the customizer contains all of the menus that are currently being used in your ClassiPress site. You can customize the location, name and order of the following menus:
- The Dashboard Menu
- The Footer Menu
- The Header Menu
- The Top Bar Menu
From Menus you can also add new menus if needed. Users tend to mainly add to the Header menu.
Example: Standard Header Menu
Below is the default header menu that comes with the ClassiPress AppTheme.

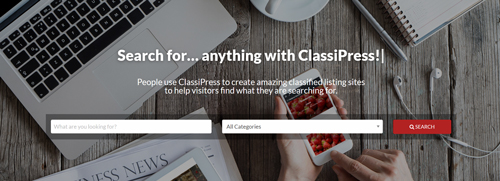
HomePage Settings
We recommend that you leave the homepage display as a Static Page. Initially the homepage will be titled Search for… and the posts page will be titled Blog. These are simply pages that can be found under the Pages menu in your WP dashboard.
The Homepage by default displays text and a category search bar. You can edit this page by:
- Locating the Search for… page within your Pages menu.
- You can then edit the text found on this page.
- Ensure you Update the changes once you have finished.
Example: Default Homepage Titled ‘Search for…’
‘Publish’
Ensure after you have customized the appearance of your site that you click the ‘Publish‘ button prior to exiting the customizer.